Stock Transfer – How to create/update/end/delete the stock transfer in web admin?
Introduction
This post will guide you on creating/updating/ending/deleting the stock transfer in web admin.
How to create/update/delete/end the stock transfer?
Create stock transfer
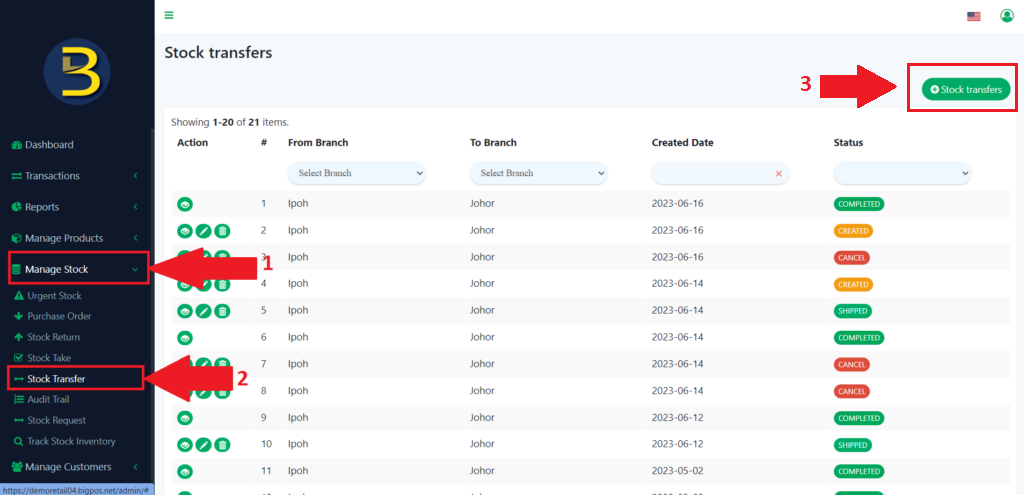
- First, will show you how to create a stock transfer, you need to go to “Manage Stock” in the left panel to expand the subcategory.
- From the subcategory look for the “Stock Transfer” to redirect you to the stock transfer page.
- Then, click on “+ Stock transfers.“
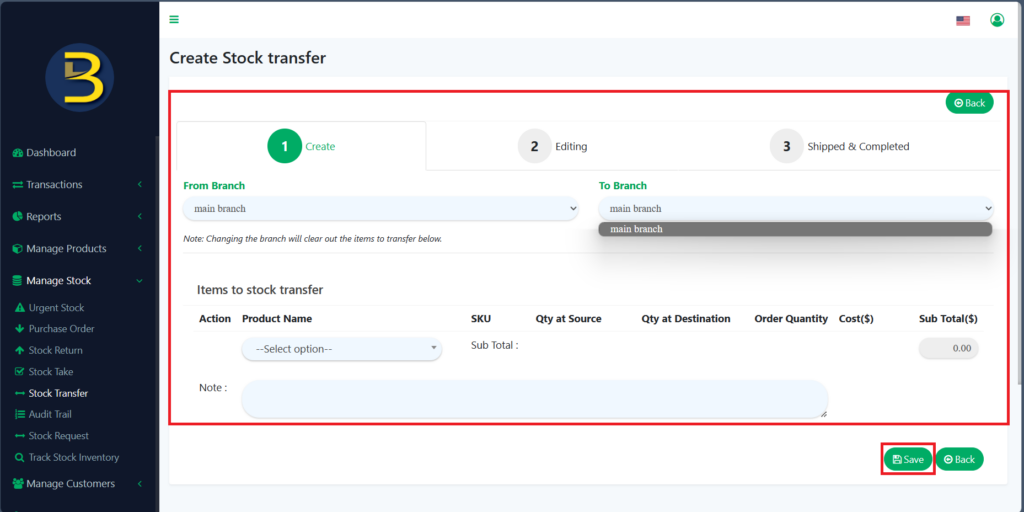
4. After that, when you are on the create stock transfer page, you need to fill in the information and click the “Save” button to complete creating a new stock transfer.
Update/edit stock transfer
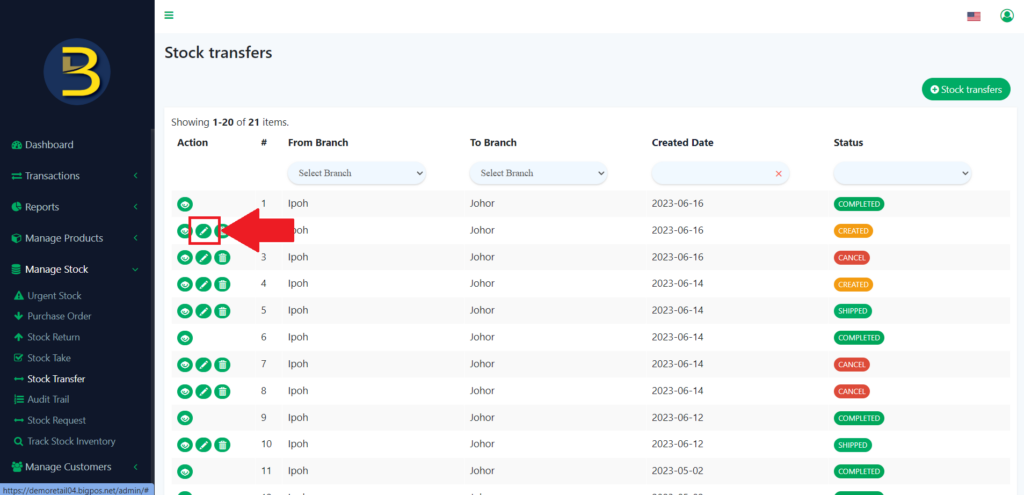
5. Then, if you want to edit the stock transfer, you can click on the pencil icon, to edit/ update the stock.
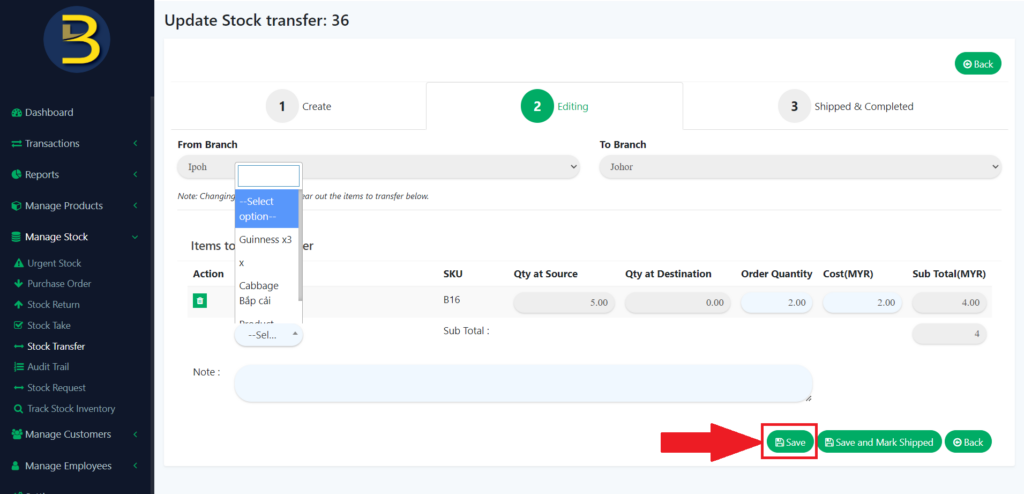
6. You need to edit/update the amount of the product that needs to transfer or add a new product to transfer to the destination.
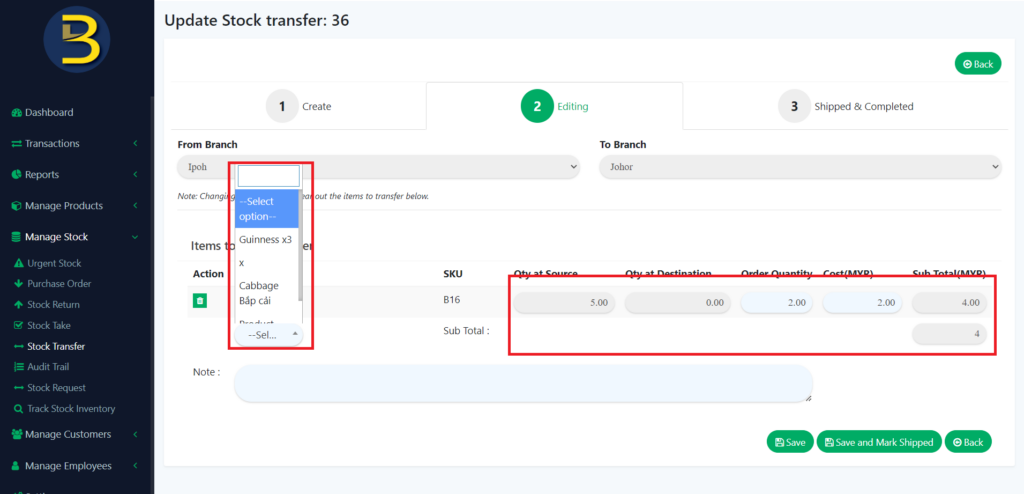
7. Then, click on the “Save” button to save the changes you have made.
End the stock transfer
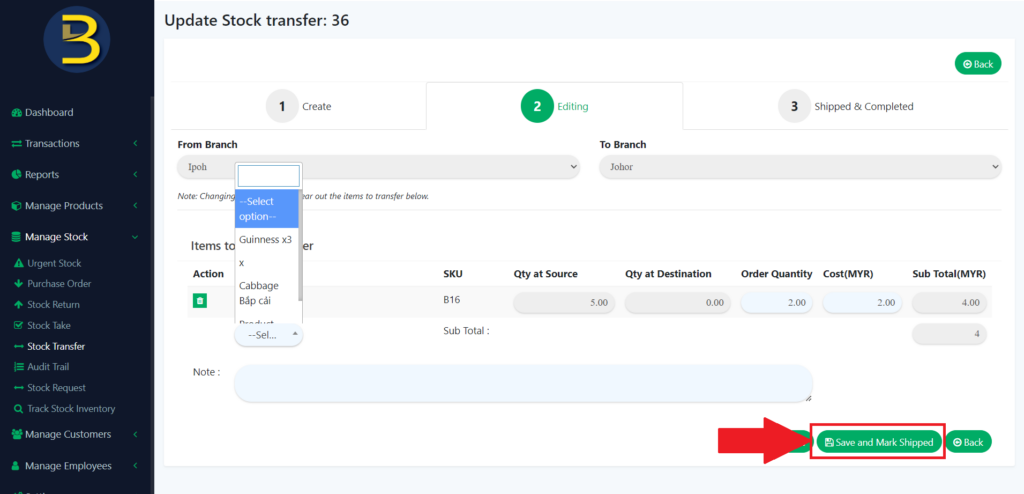
6. After you have received the stock transfer, you need to click on “Save and Mark Shipped” to mark that the stock has been shipped.
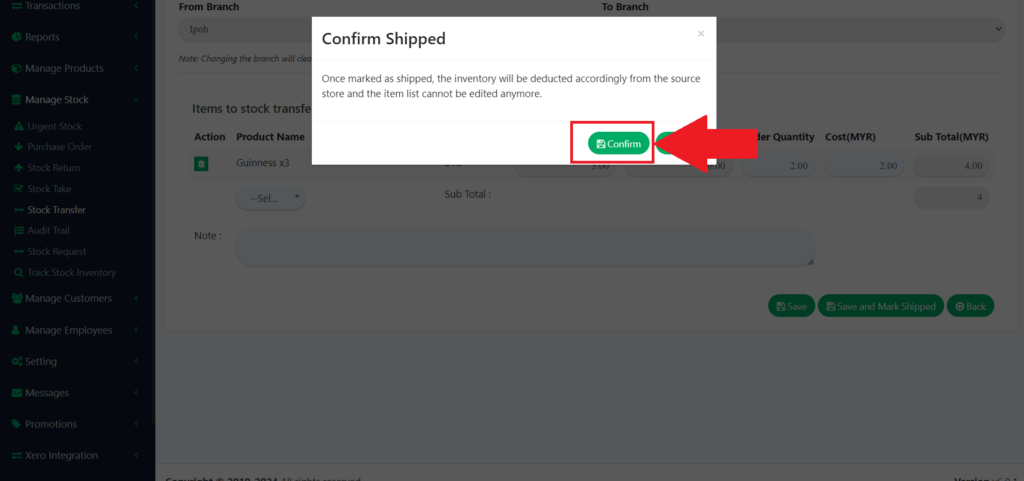
7. Then, there will be a message to confirm that the stock has been shipped.
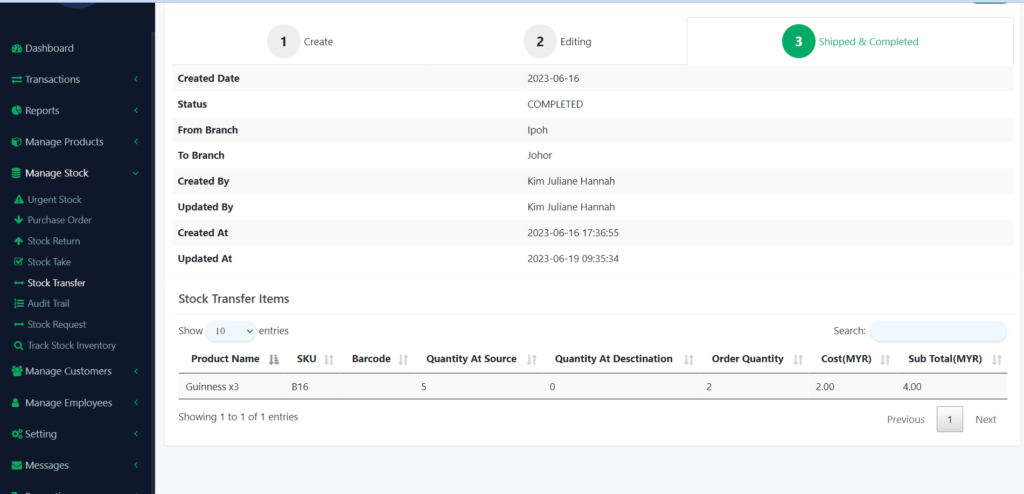
8. The page looks like this after finishing the transfer.
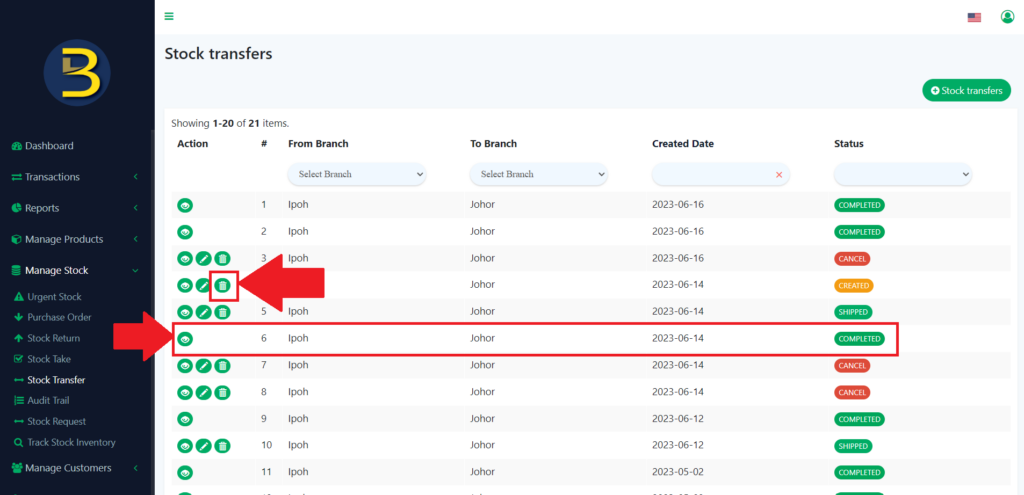
Delete the stock transfer
9. To delete the stock transfer, you need to click on the dustbin icon to delete the stock transfer.
10. Delete can be done during stock transfer but not after the transfer.
11. There will be an alert message for the confirmation to delete the stock transfer.
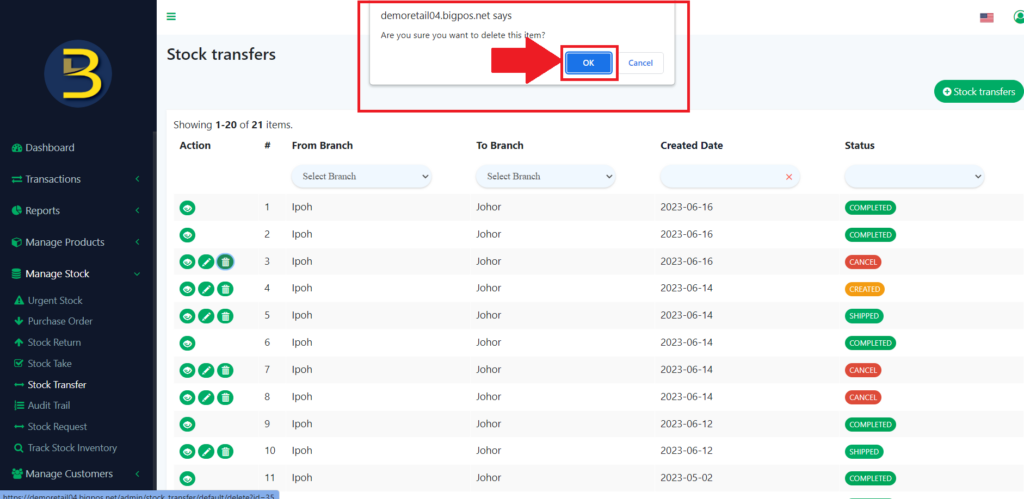
12. The stock transfer is deleted.