How Can We Help?
Schedules – Create Schedule Page
Introduction
Create a schedule allows user to manually declare schedule with custom messages to be sent to a customer upon the schedule condition met. User can choose to include their WhatsApp Business Short URL within the schedule message. Image and video are also accepted in the schedule messages.
How to ‘Create Schedule’?
To begin adding a schedule, follow the following steps:
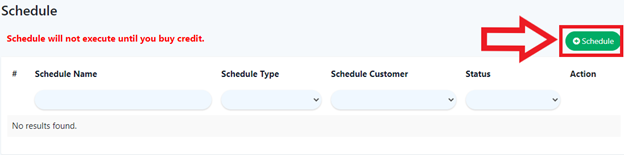
- First, navigate to the Schedule main page as shown in Schedule Main Page section.
- Within the Schedule main page, click on the green ‘Schedule’ on the right which will redirect into the ‘Create Schedule Page’.
- After filling all the required inputs, the user shall continue by clicking on
 or cancel.
Schedule Details
- Schedule Name
Name of the created schedule.
- Schedule Type
Specifies the type of schedule that will be executed based on the specified scenario.
- Schedule Customer
Select whether to restrict the schedule to only certain customers.
- Schedule Message
Input for message that will be sent to a customer upon execution of the schedule.