Manage Promotions – Create Promotion
Introduction
Create promotion allows the creation of unique promotions to be used during an order which can be monitored and controlled via BIG POS Web Admin.
How to ‘Create Promotion’?
To begin adding a schedule, follow the following steps:
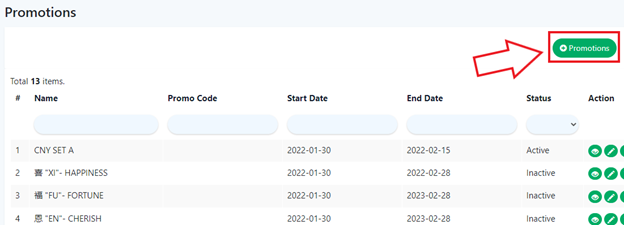
- First, navigate to the Promotions main page as shown in Promotions Main Page section.
- Within the Promotions main page, click on the green ‘Promotions’ on the right which will redirect into the ‘Create Promotions Page’.
- After filling all the required inputs, the user shall continue by clicking on
 or cancel.
Promotions Details
- Name
Name for labeling the promotion.
- Promotion Channel
Specifies which channels are applicable to use the promotion.
- Branch
Specifies which branch(es) is applicable to use the promotion.
- Status
Used for indicating whether the promotion is currently active or inactive.
- Start Date
The beginning date where the promotion becomes applicable
- End Date
The ending date where the promotion becomes expired and inapplicable.
- Effective On Every
Selects whether to restrict the promotion on specific days.
- Start Time
Determines when the promotion will be usable within a day.
- End Time
Determines when the promotion will not be usable within a day.
- Discount Type
Specifies how the promotion will affect the final balance of a transaction. Various types of discount are available, for more info refer to Discount Type Section.
- Require Specific Product Purchase
Selects whether to restrict the promotion to only certain products. For more info, please refer to this section.
- Apply To
Selects whether to restrict the promotion to only certain orders that fulfill the conditions. For more info, please refer to this section.
- Customer Eligibility
Selects whether to restrict the promotion to only certain customers.
How to ‘Edit Existing Promotions’?
To begin editing existing promotions, follow the following steps:
- Similarly, head over to ‘Promotions’ on the left side panel.
- Using the dropdown menu, proceed by clicking on ‘‘Manage Promotions’.
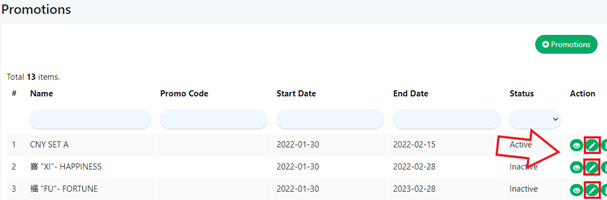
- After step 2, scroll to the right in the list of promotions until the action column, click on the pencil icon
 in the column where the promotion will be edited which will redirect the user to the ‘Update Promotion Page’.
- Edit the inputs as required and click on on or cancel.