Invoice changes
Introduction
This post will guide you on how to changes the invoice receipt to be more details with the company profile. The changes only apply on Full Bill Receipt. Thus, invoice changes can be set based on the preferences of users.
How to change the invoice receipt
a) The Web Admin settings
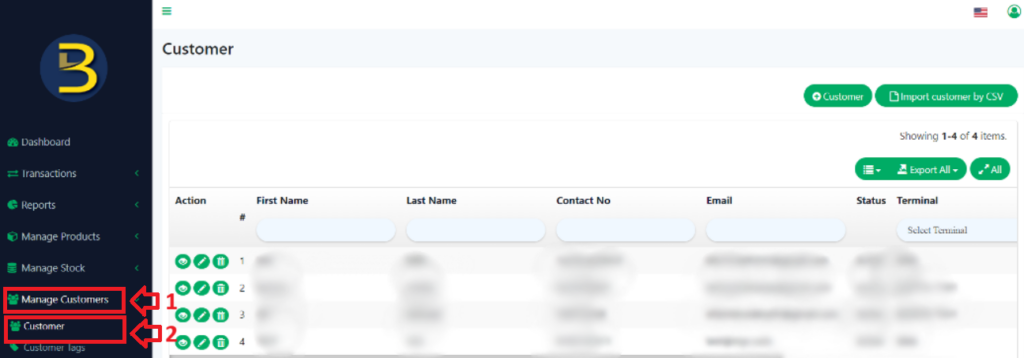
- Go to the Web Admin, click Manage Customers.
- Look for subcategories and select “Customer“.
- To enable invoice receipt changes, users can create a new customer or update customer information.
4. In this demonstration, we will create a new customer.
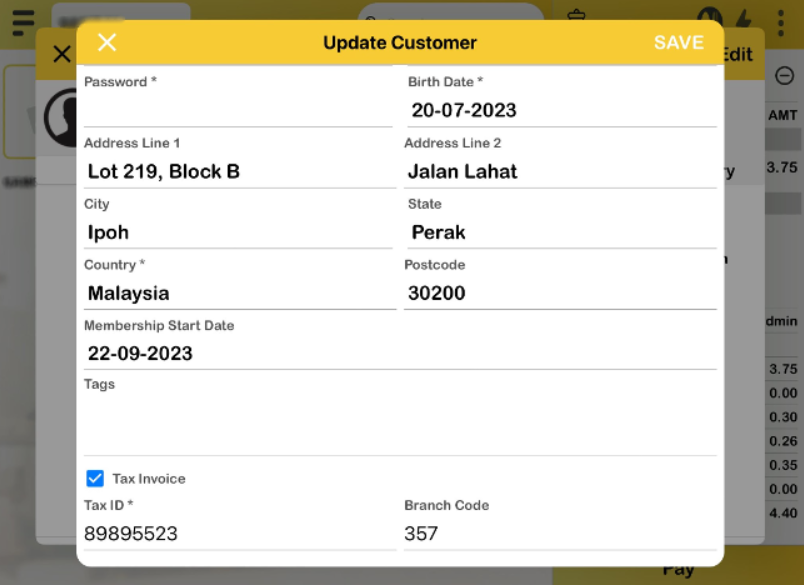
5. Fill in the customer information, and make sure to tick “Tax Invoice“. The Tax ID and Branch Code will be appear as the accompanying picture.

6. Now, proceed to Bigpos Pro. Create a new order with the specific customer that has been created.

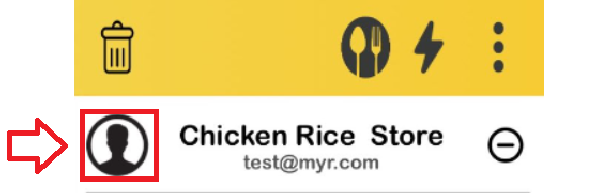
7. Another setting for invoice changes: When the user clicks on the “customer icon“. The customer details will be displayed as shown in the image below.
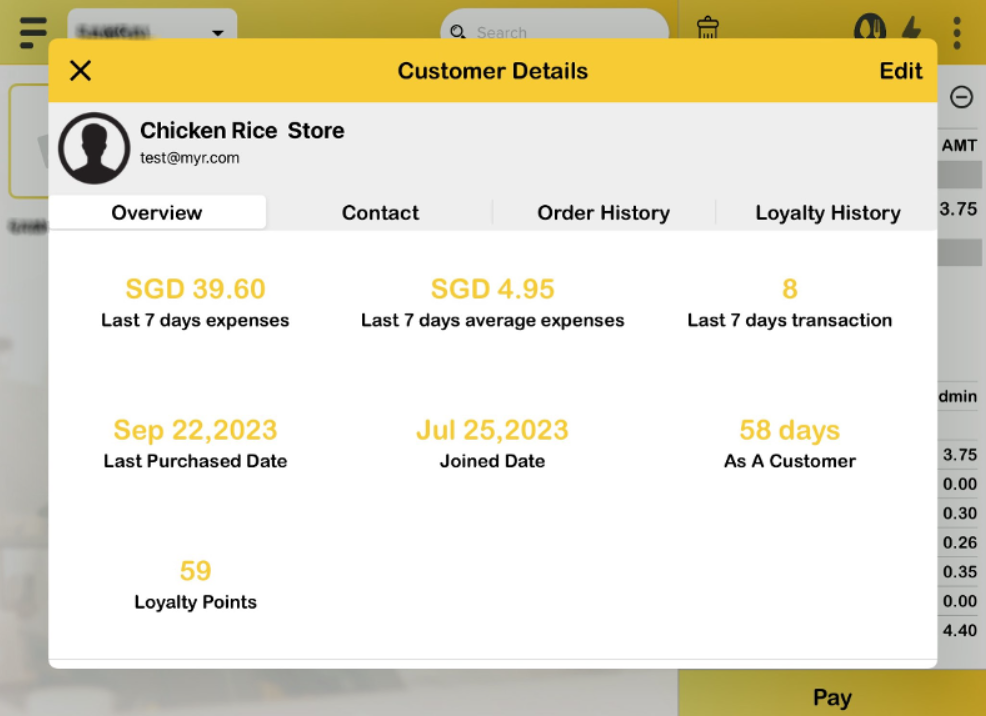
8. Click “Edit” , the Update Customer form will appear. Users need to tick “Tax Invoice” for the Tax ID and Branch Code to appear. Then, click “SAVE.”
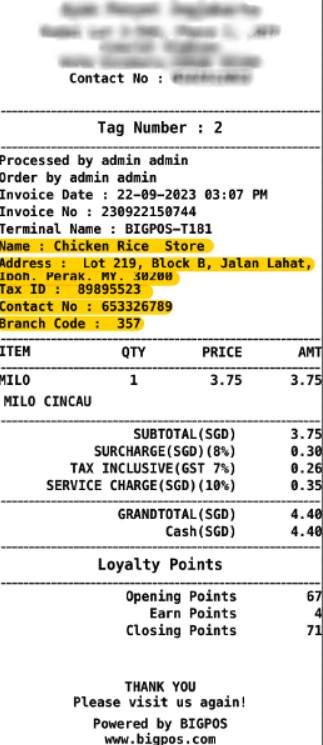
9. When the customer decides to pay, the result of the Full Bill Receipt will be illustrated in the image below.
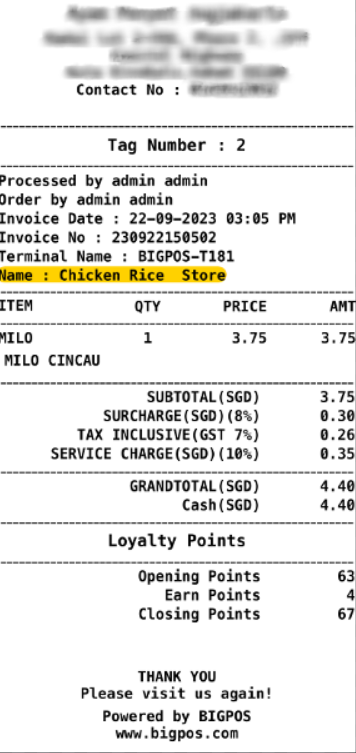
8. If you disable the Tax Invoice, the full bill receipt will be depicted as shown in the image below without the company details.
Note: The invoice changes with settings such as Web Admin and Bigpos Pro can be applied to Bigpos Lite, Waiter and QR Menu Order.
Scenario
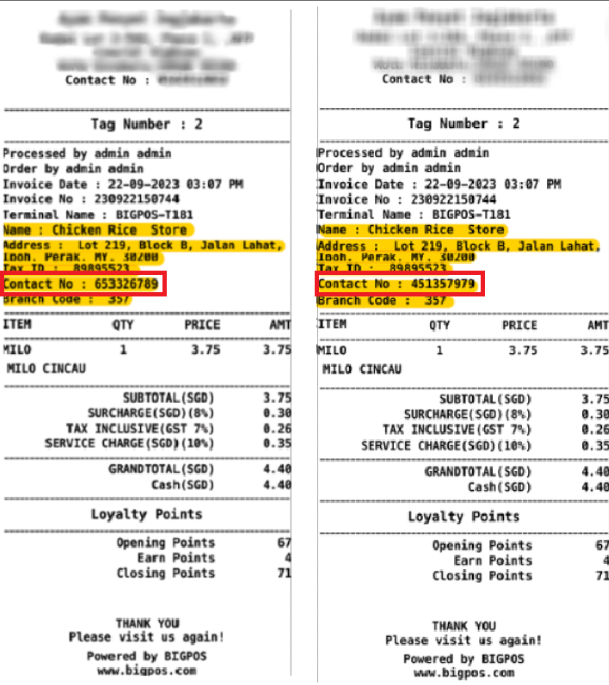
Any updates or deletions will automatically sync with the system to ensure the latest information.
Example
- For instance, when we change the phone number of the customer as in the illustration below and click “SAVE“.
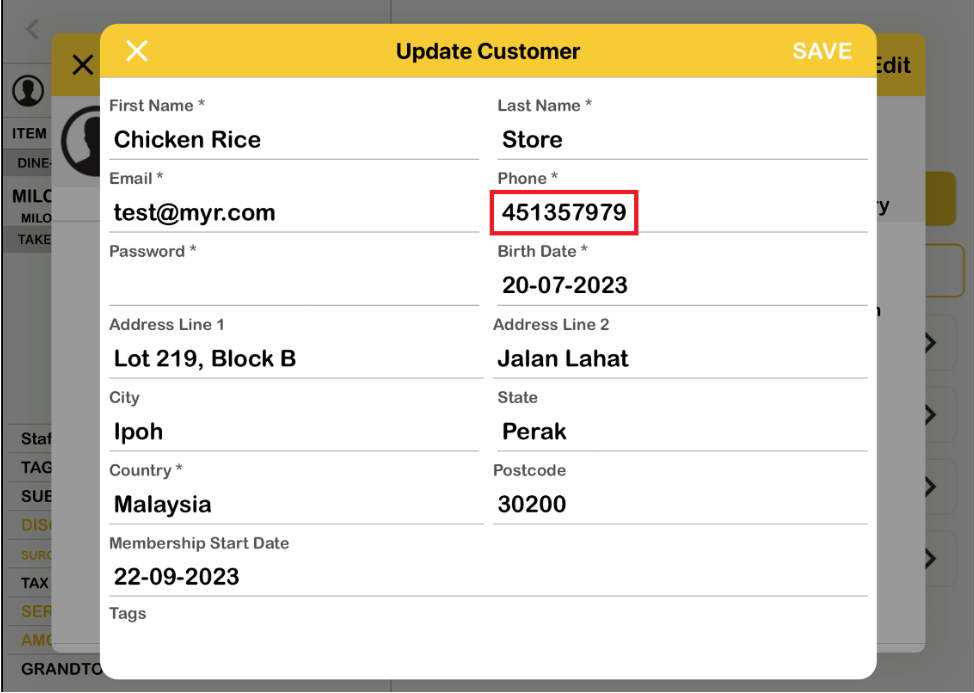
2. Review the invoice, the contact number has been changed even though the transaction has already been completed.