How to Setup Paradigm Mall Integration
Introduction
This post will guide you on how to set up and use the Paradigm Mall Integration feature in BIGPOS Pro, including automatic and manual sales file uploads, Z Report submission, and how to check the uploaded files.
Connection Setup Paradigm Mall Integration in BIGPOS Pro
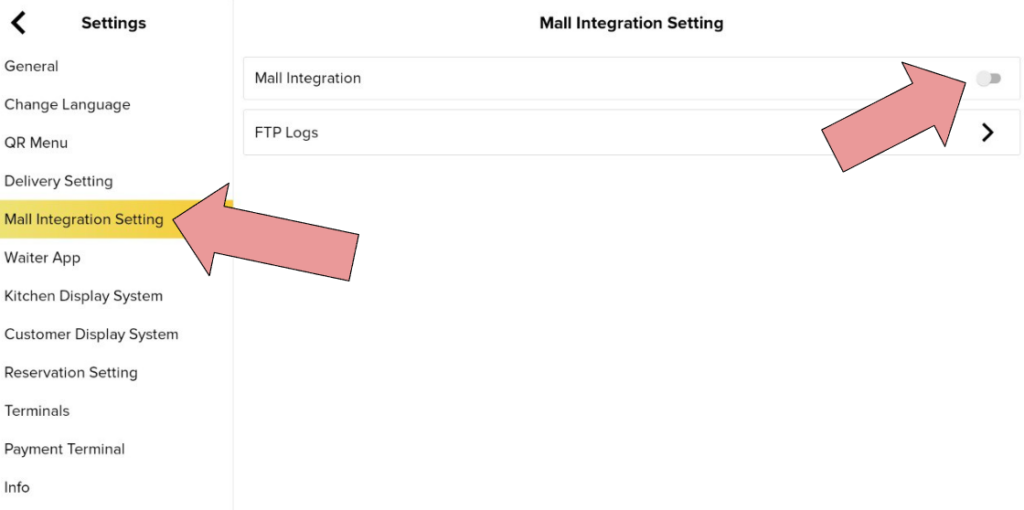
- Open BIGPOS Pro App and click on “Settings”.
- Select “Mall Integration Setting” and enable “Mall Integration”.
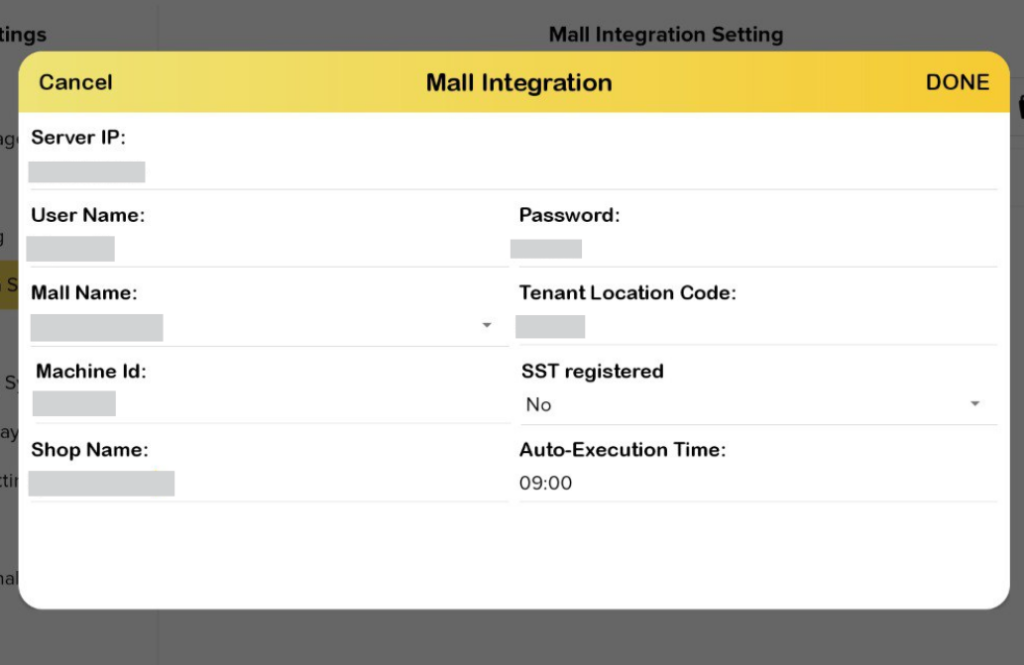
- Then, enter all the details and click “Done” to complete the setup.
File Naming Format
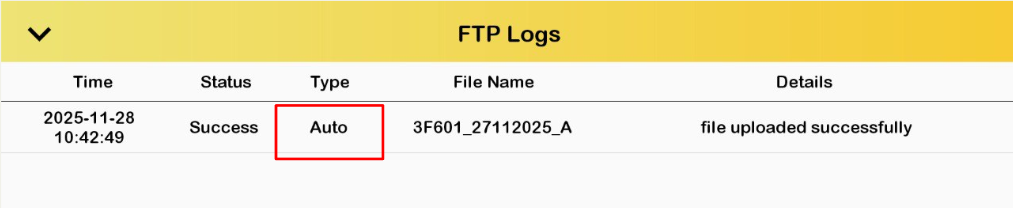
These two files will be uploaded to the mall server however in the Z Report, it will not display in the FTP logs, only stored in the server directory.
- Daily Sales File
<Tenant Location Code>_<DDMMYYYY>_<A>.txt
- Z Report
<Tenant Location Code>_<DDMMYYYY>_<ZRPT>.pdf

Type of Files Upload
Auto Upload
- The system will automatically upload yesterday’s sales file at the scheduled time.
- If yesterday’s sales file was not uploaded before the disconnection, it will be automatically uploaded upon reconnection.
Manual Upload
- Click on the folder icon
- Select previous date and click “OK” *(Today’s date cannot be selected, can only selected the date before)*.
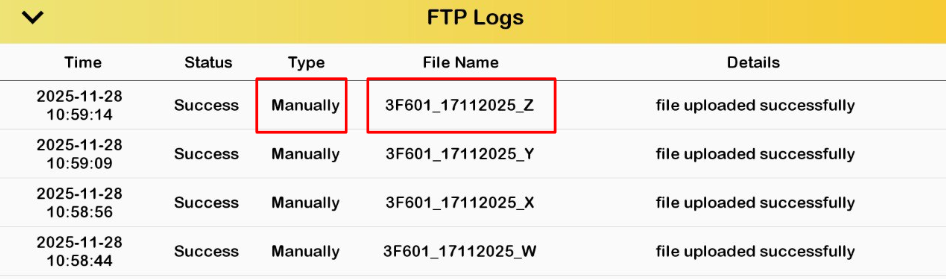
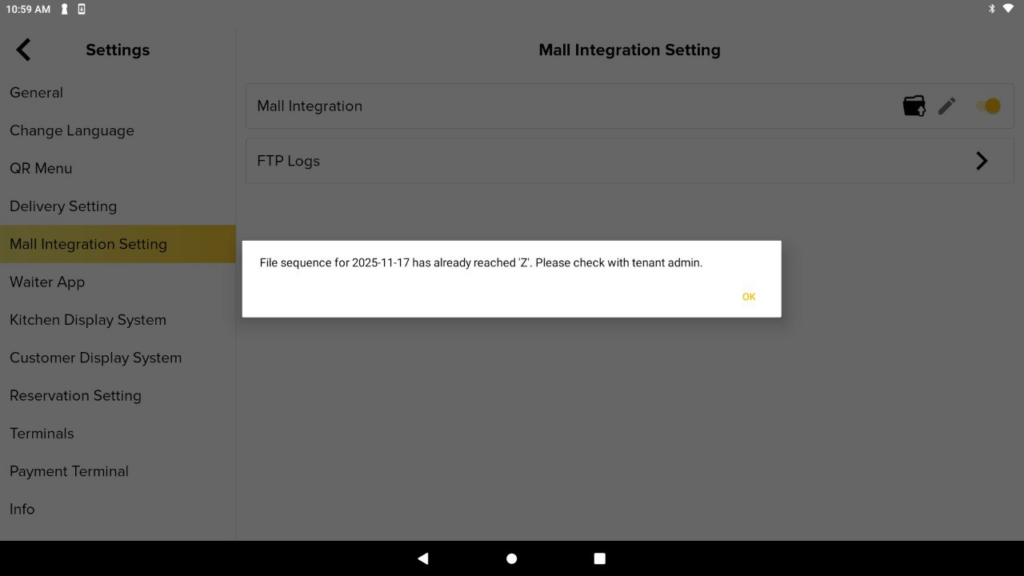
Notes: The Daily Sales file is able to resend and the sequence of sales files will be named from A-Z. Once the Daily Sales file reaches sequence Z, a warning message will be prompted to prevent spamming.
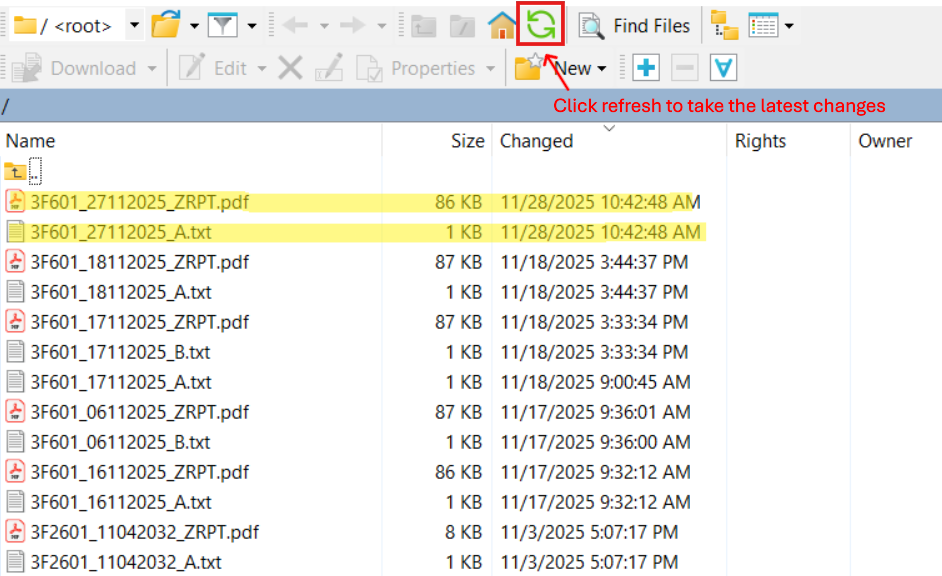
How to check the uploaded file?
Make sure to download WinSCP to access the directory and check the files uploaded.
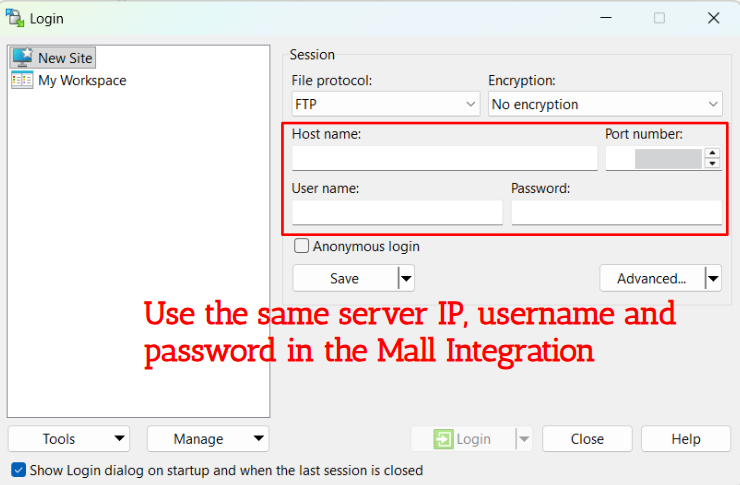
Setup WinSCP
- Login to the server
- After successfully connect to the server, able to check all the uploaded files:
- Z Report
- Sales file
- Select both files, right-click and download to check the details inside
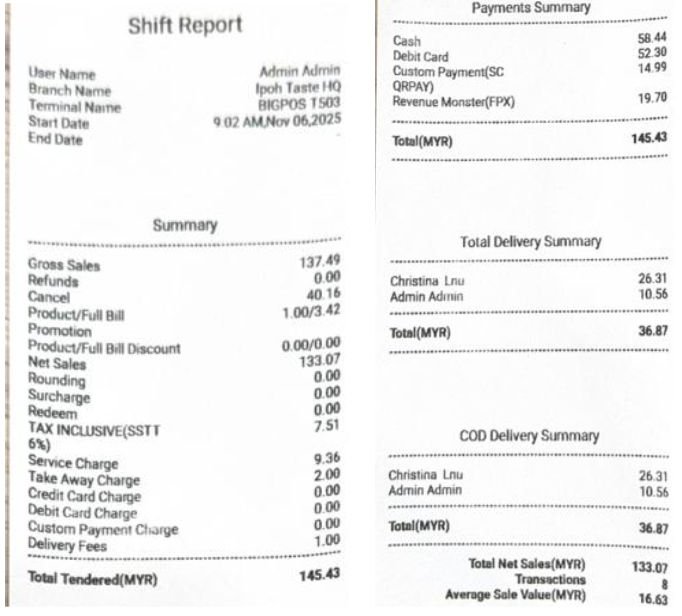
Report
Z Report
The Z Report value should match the Daily Shift Report printed from BIGPOS Pro.
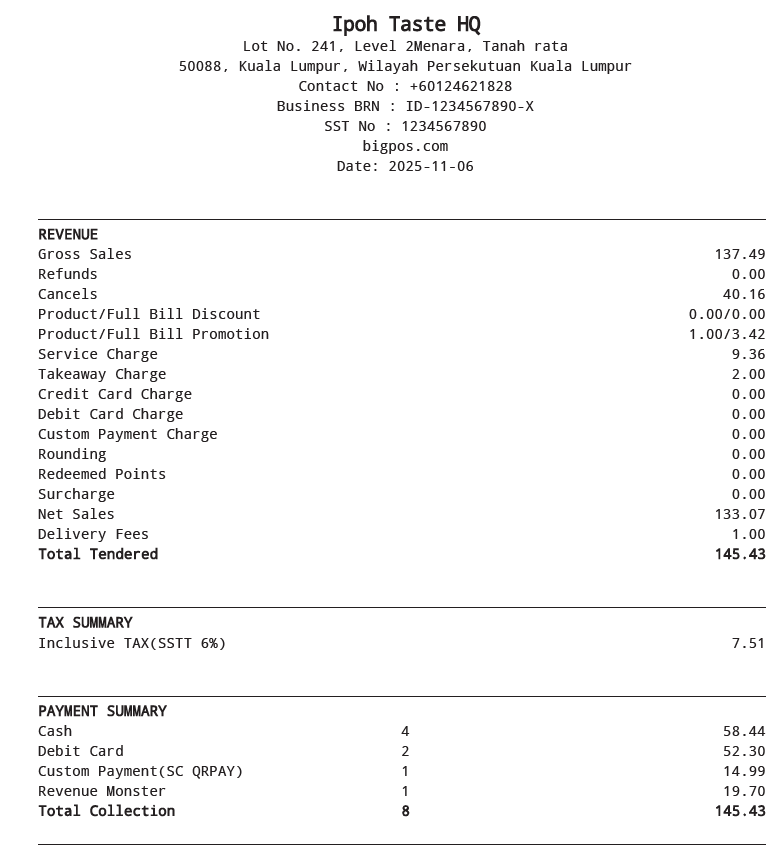
Daily Shift Report