How to manage application banner setting
Introduction
This post will guide you through managing the application’s banner settings, with a focus on four types of banner: the QR menu banner, the dual screen, the SOK banner, and B Reward Apps.
How to manage application banner setting
The basic banner settings
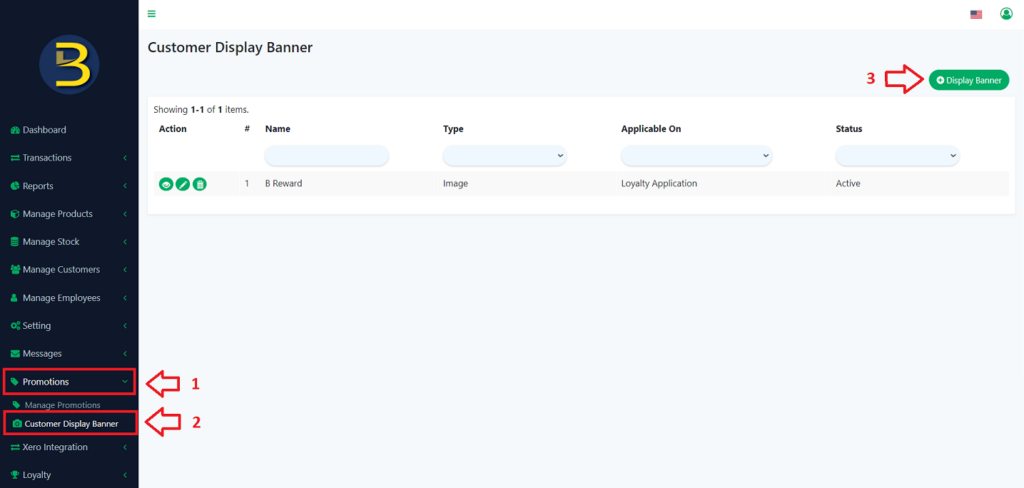
- Open the web admin and search for “Promotion.“
- Look for subcategories and select “Customer Display Banner.“
- To create a new banner, click “Display Banner”.
a) The QR Menu banner
- Finish setting up the basic banner.
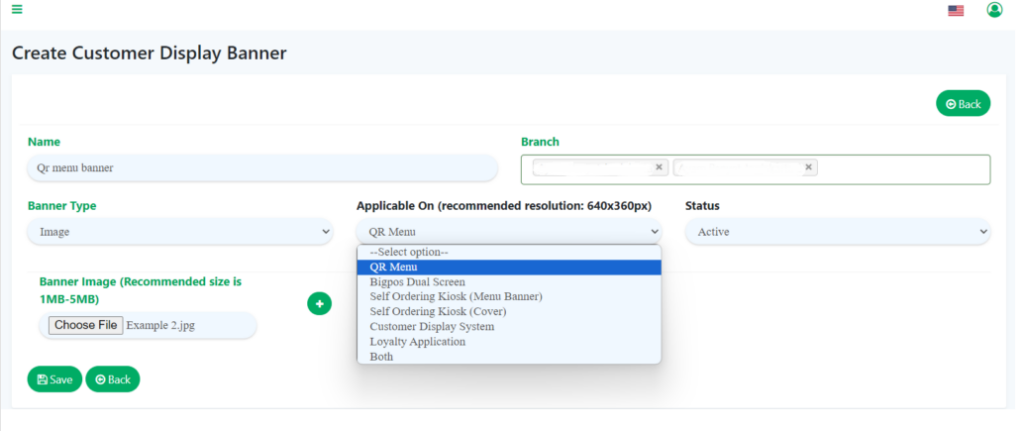
- When adding a new banner, make sure to enter the name, select the branch, and choose “QR Menu” as the banner type. Set it to “Active” to display it on the QR Menu.
- The suggested image size for the banner should fall within the range of 1MB to 5MB, with a banner dimension of 640 x 360 pixels.
- Click “Save“.
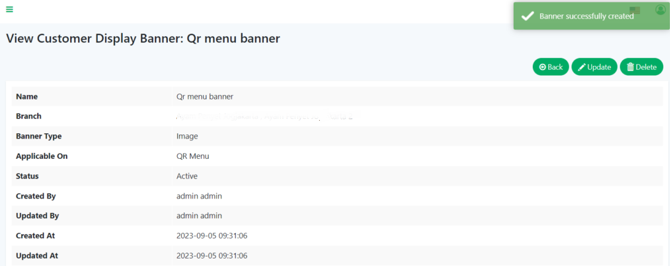
5. After successfully creating the banner, the system will automatically switch to view mode, as shown in the image below.
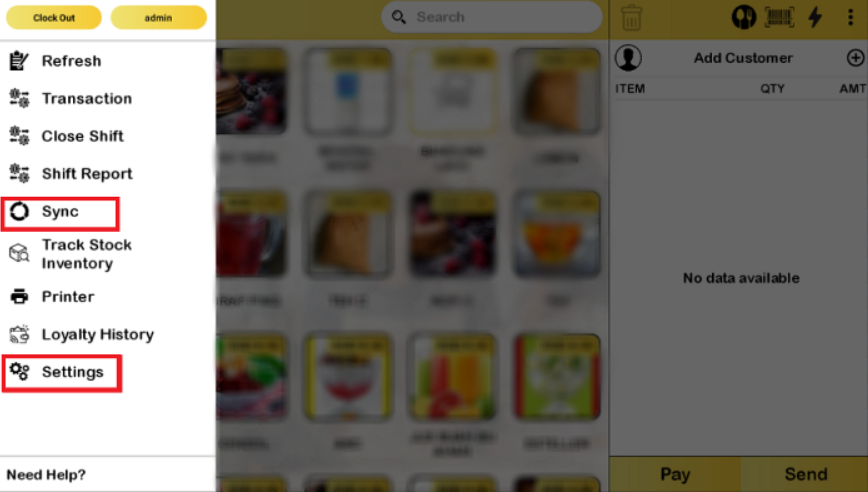
6. Now, go to BIGPOS Pro or Lite to activate QR Menu. Start by clicking “Sync” , and once the data synchronization is complete, click on “Settings“.
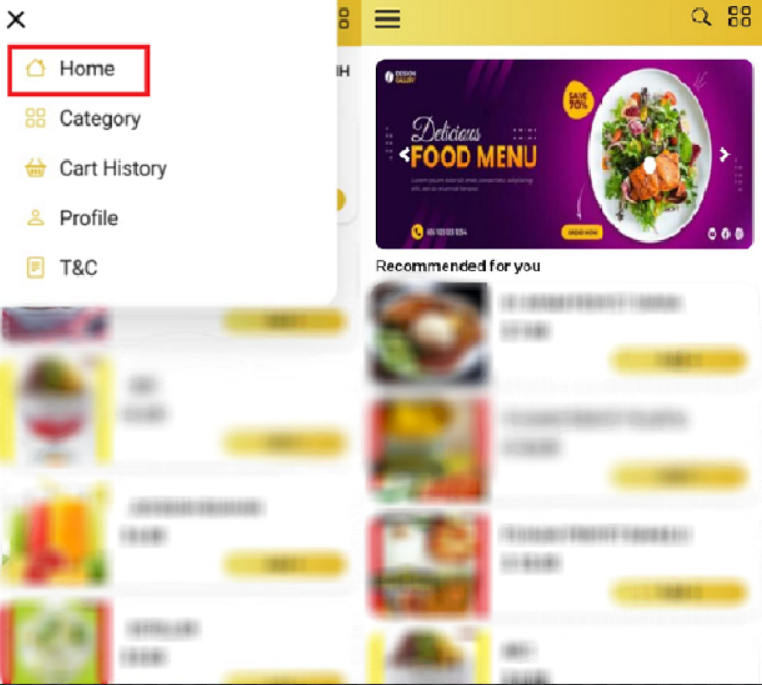
7. The banner should appear on customer’s device when they click on “Home“.
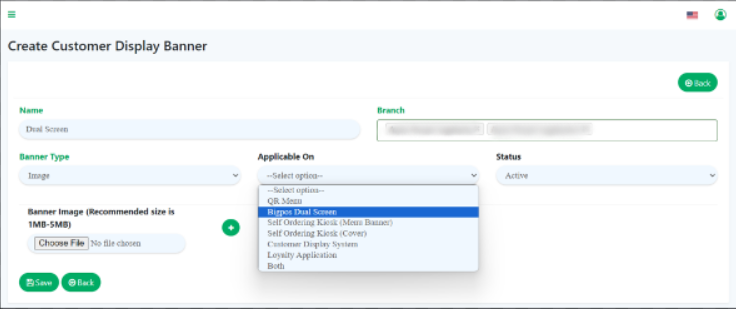
b) Dual screen
- Finish setting up the basic banner.
- When adding a new banner, make sure to enter the name, select the branch, and choose “Bigpos Dual Screen” as the banner type. Set it to “Active” to display it on the Dual Screen.
- The suggested image size for the banner should fall within the range of 1MB to 5MB.
- Click “Save“.
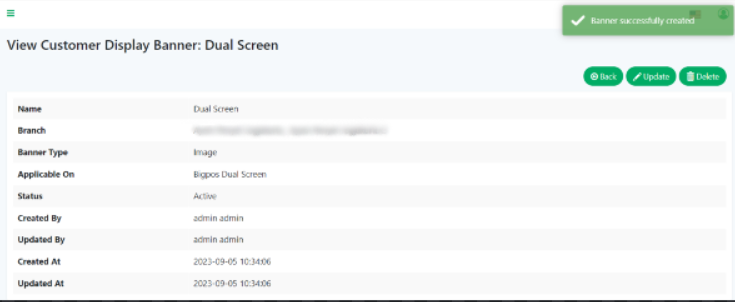
5. The system will automatically be in view mode after the banner is successfully created as a figure below.
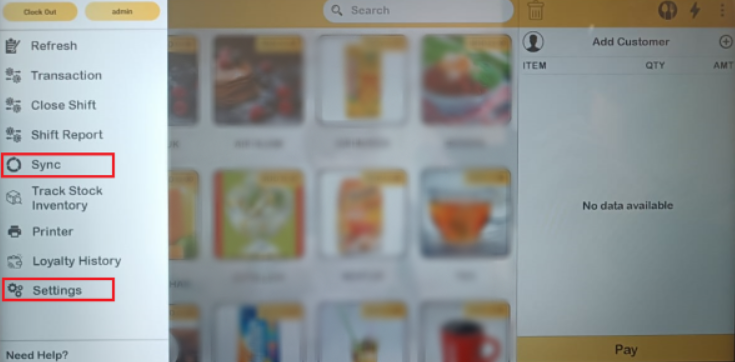
6. Now, go to BIGPOS Pro or Lite to activate Dual Screen. Start by clicking “Sync” , and once the data synchronization is complete, click on “Settings“.
7. At “General“, make sure to scroll up until you see “Allow Dual Screen“. Switch on the “Allow Dual Screen“.

8. Banner will appear as shown in the picture below.
c) The SOK banner
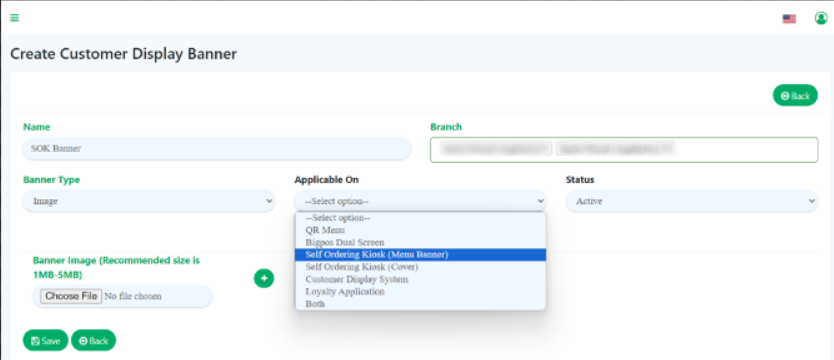
- Finish setting up the basic banner.
- When adding a new banner, make sure to enter the name, select the branch, and choose “Self Ordering Kiosk (Menu Banner)” as the banner type. Set it to “Active” to display it on the SOK.
- The suggested image size for the banner should fall within the range of 1MB to 5MB.
- Click “Save“.
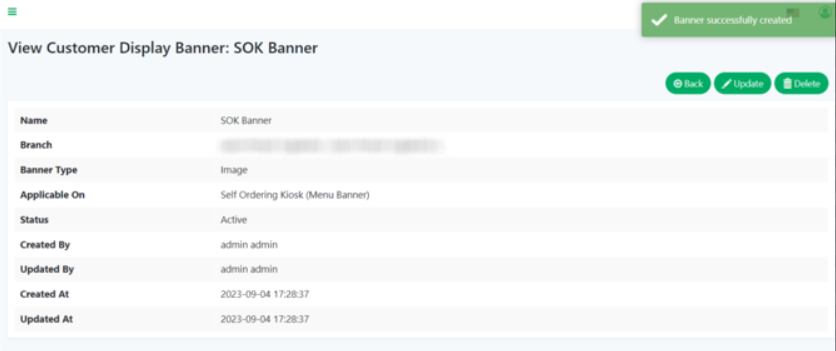
5. After successfully creating the banner, the system will automatically switch to view mode, as shown in the image below.
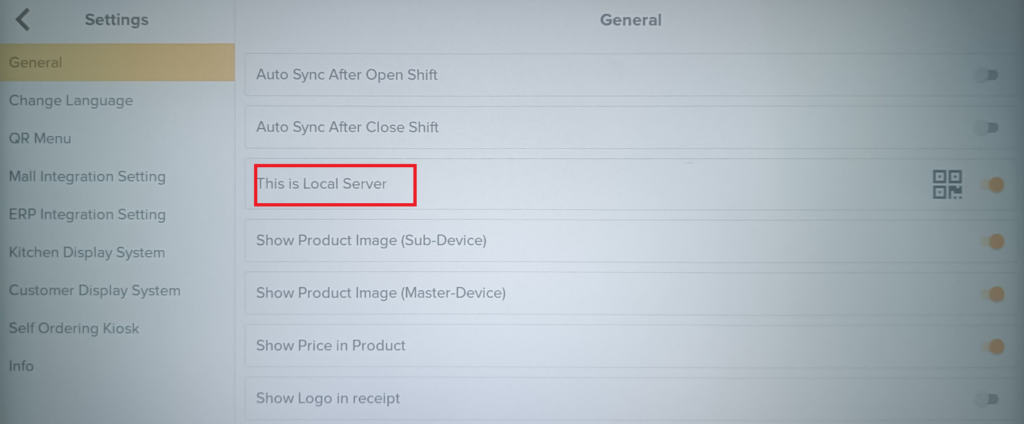
6. Now, go to BIGPOS Pro or Lite to activate SOK banner. Start by clicking “Sync” , and once the data synchronization is complete, click on “Settings“.

7. In the “General” section, be sure to switch on “This is Local Server“.
8. Next, navigate to “Self Ordering Kiosk” in the device and give it a tap. Then, hit “Add Self Ordering Kiosk“.
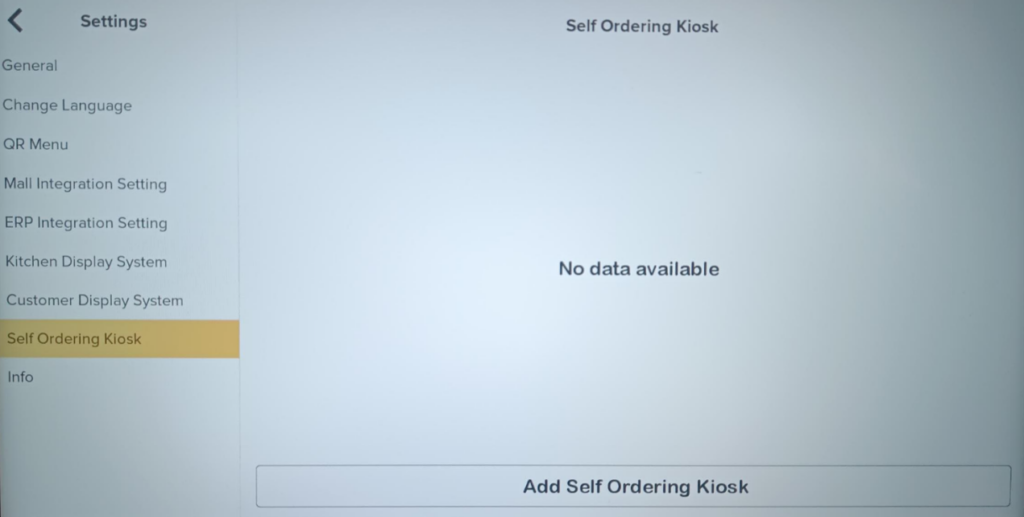
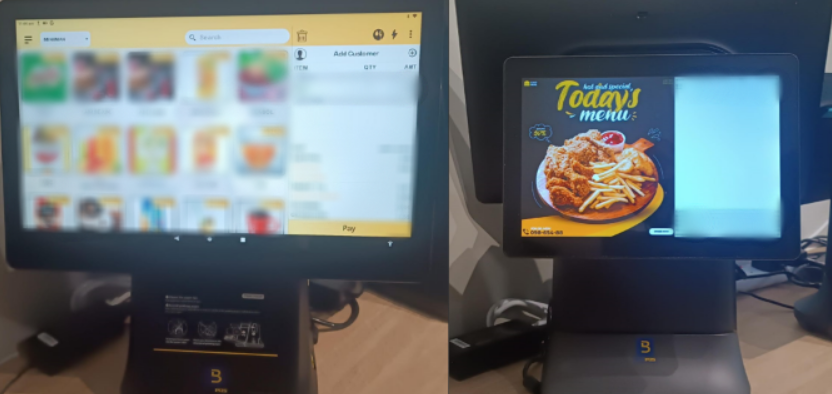
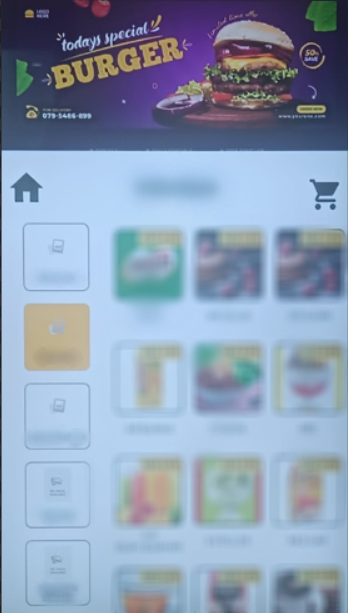
9. The SOK banner will appear on the SOK screen.
d) B Reward Apps
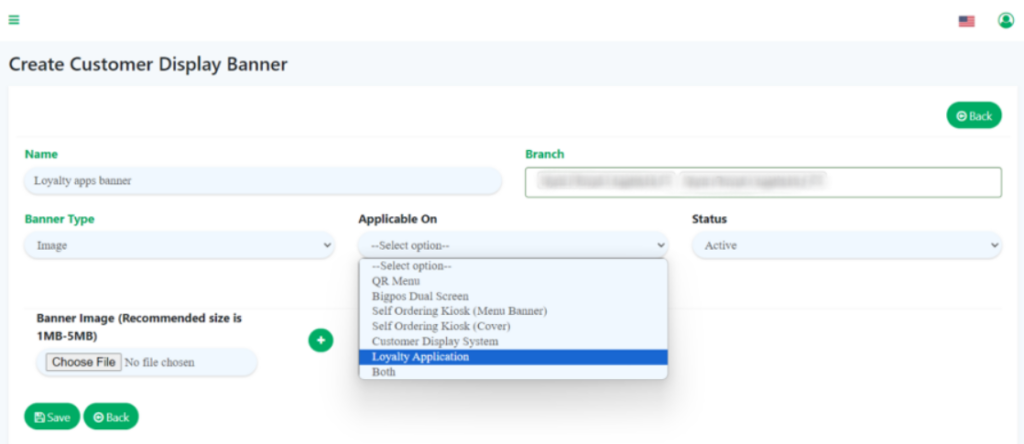
- Finish setting up the basic banner.
- When adding a new banner, make sure to enter the name, select the branch, and choose “Loyalty Application” as the banner type. Set it to “Active” to display it on the B Reward Apps.
- The suggested image size for the banner should fall within the range of 1MB to 5MB with a banner dimension of 780 x 280 pixels.
- Click “Save“.
5. After successfully creating the banner, the system will automatically switch to view mode, as shown in the image below.

6. Go to the B Reward Apps and the banner will appear on the customer device.

Noted: Customers can add more than 1 for each application, including QR Menu. The banners will shuffle automatically.