How Can We Help?
Branch – How to create/update/delete a branch in web admin?
Introduction
This post will guide you on how to update/delete branches in web admin.
How to create/update/delete a branch?
Create new branch
Creating a branch allows the creation of multiple branches of the company within various locations which can be controlled and monitored via the BIG POS Web Admin.
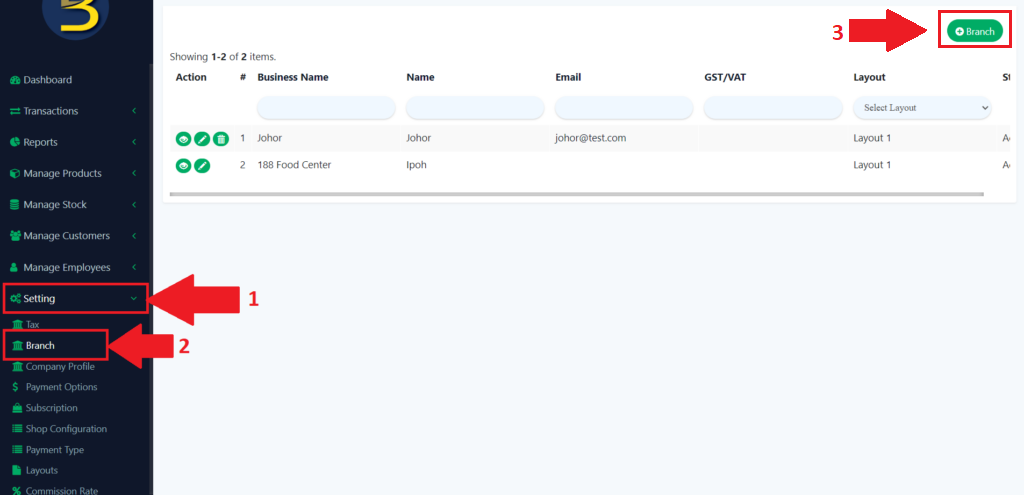
- Look for “Settings” to expand the subcategory.
- From the subcategory, look for the “Branch” to redirect to the branch page.
- Click the “+ Branch” button to create a new branch.
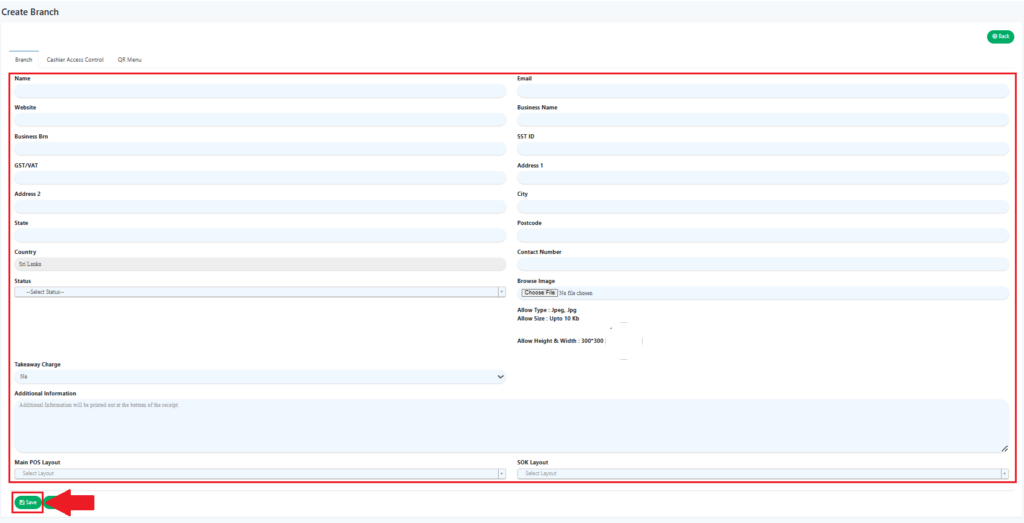
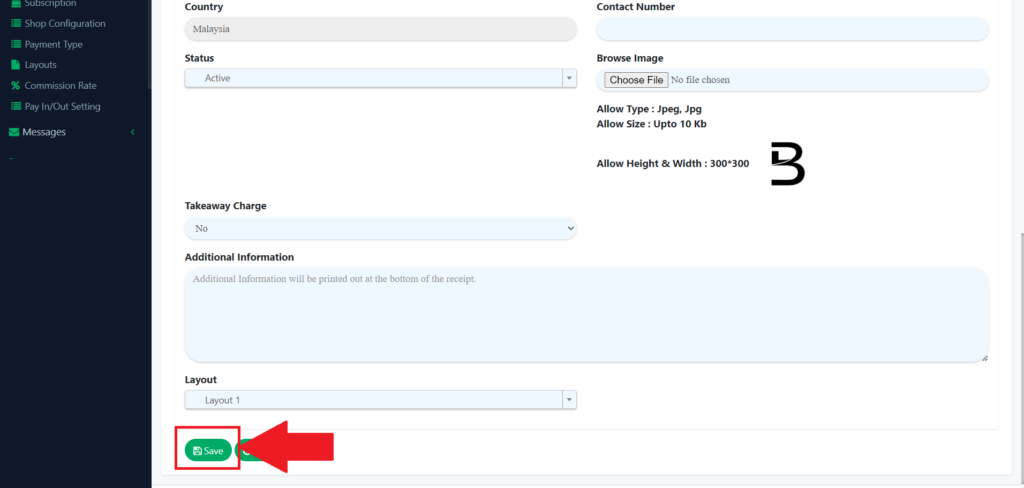
4. After that, fill in all the information and click the “Save” button to complete creating a new branch.
Update/edit branch
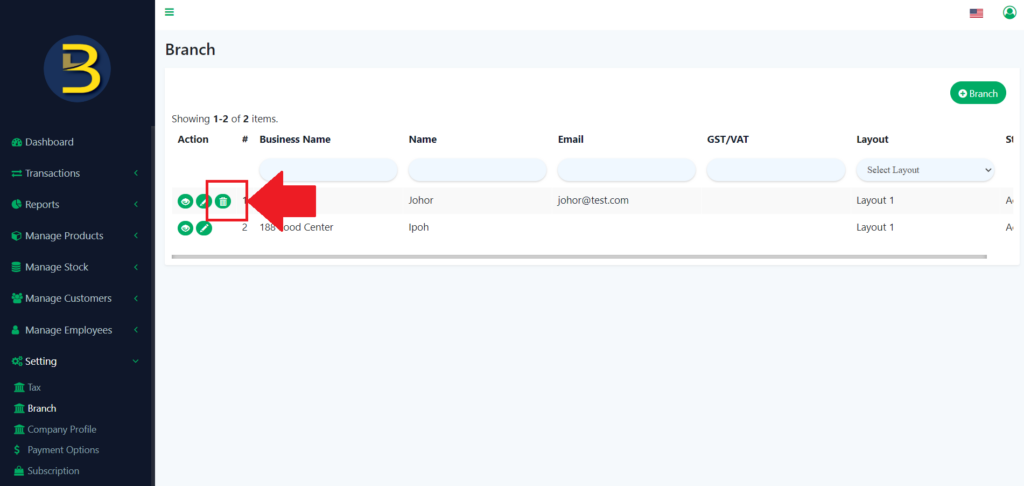
5. To update/edit a branch, you need to click on the pencil icon to update or edit the branch details.
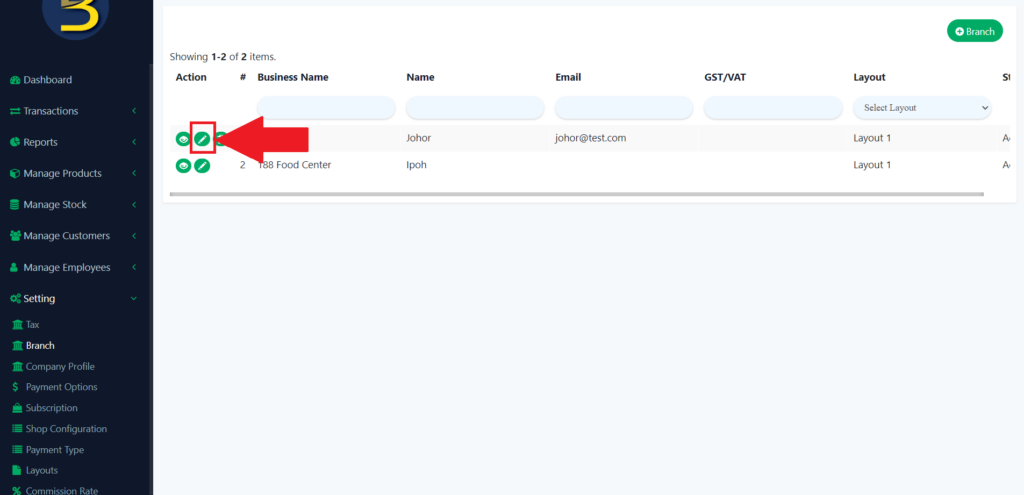
6. Then update or edit the detail of the branch and then click on the “Save” icon to save the updated detail.
Delete branch
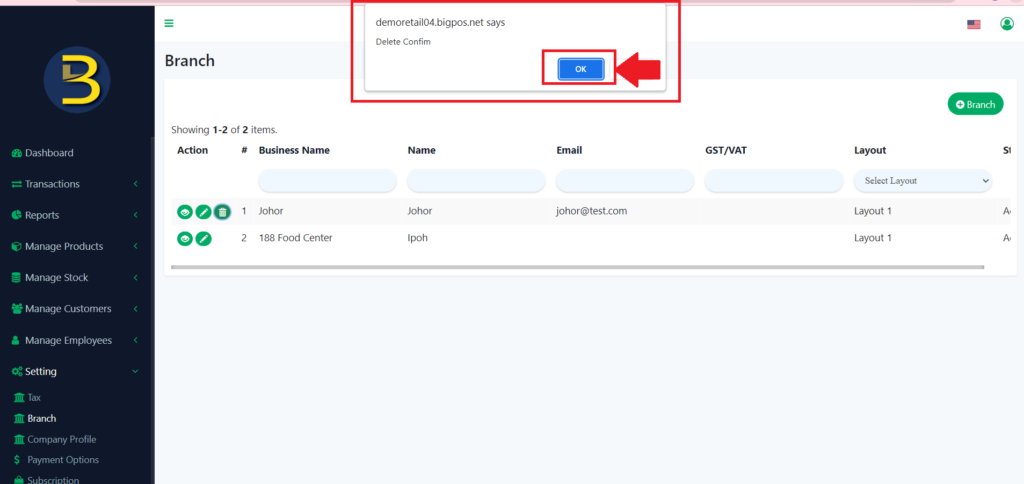
7. To delete the branch, you need to click on the dustbin icon to delete the branch.
8. There will be an alert message asking for confirmation to delete the branch.