E-Invoicing Setup Guide
Introduction
This guide is specially designed for BIG POS merchants, providing a clear step-by-step walkthrough to help you effortlessly set up and manage e-Invoicing for your business with BIG POS. It includes:
- Adding BIG POS as an intermediary on the MyInvois Portal
- Setting up and configuring e-Invoicing in the BIG POS Web Admin & Pro App
| Important Note – E-Invoicing is only available in the BIG POS Pro version 5.4.0 and above. |
Add BIG POS as an intermediary on the MyInvois Portal
To ensure smooth e-Invoicing integration, you must assign BIG POS as your official intermediary in the MyInvois Portal.
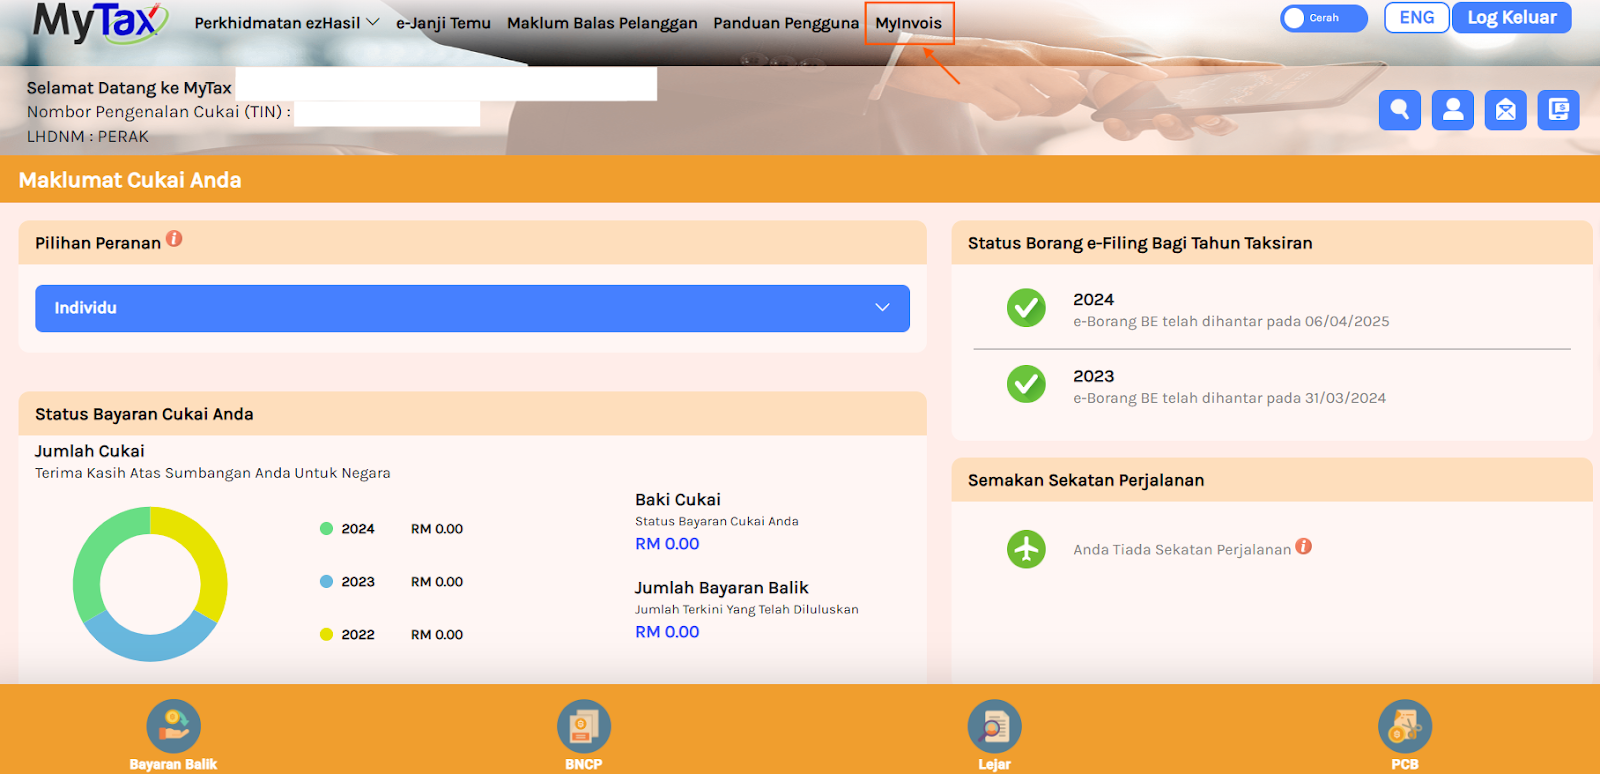
Step 1: Log in to My Tax portal, then click on the MyInvois tab.
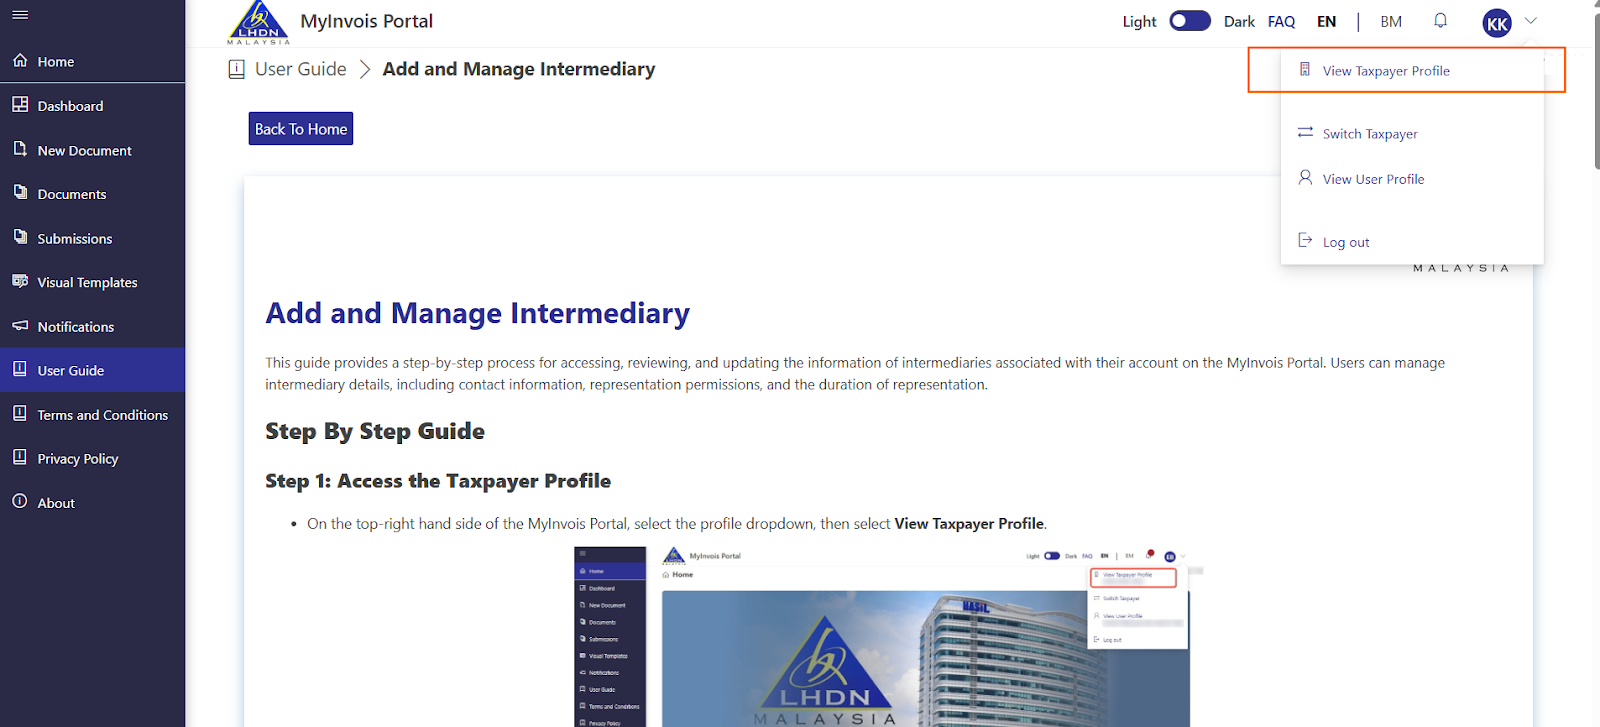
Step 2: On the top-right-hand side of the MyInvois Portal, select the profile dropdown, then select View Taxpayer Profile
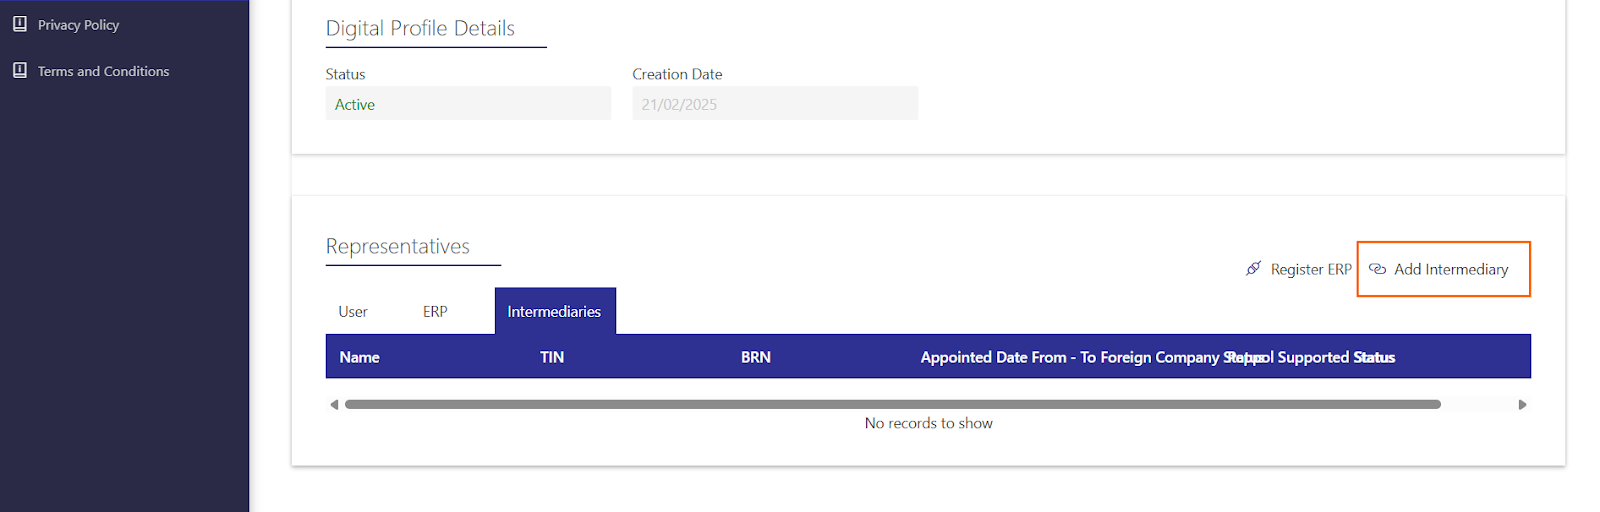
Step 3: Scroll down on the Taxpayer Profile page and click on 🔗Add Intermediary tab under Representatives.
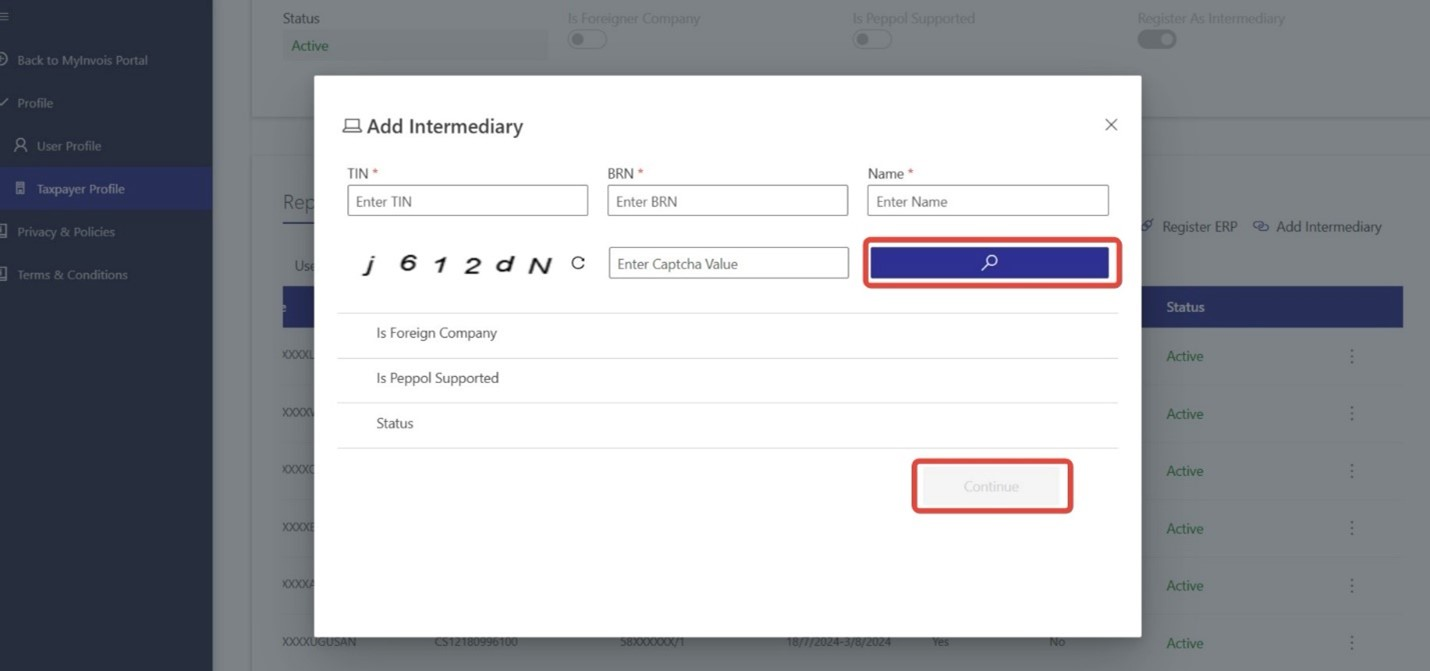
Step 4: Add intermediary by entering TIN, BRN, and Taxpayer Name in the respective fields, enter the Captcha value, click the search icon to validate, and click Continue.
Name: SYNERGY ALLIANCE SOLUTIONS SDN. BHD.
TIN: C25746052070
BRN: 201801044972
Note: Synergy Alliance Solutions Sdn. Bhd. is the company behind the development and registration of the BIG POS product
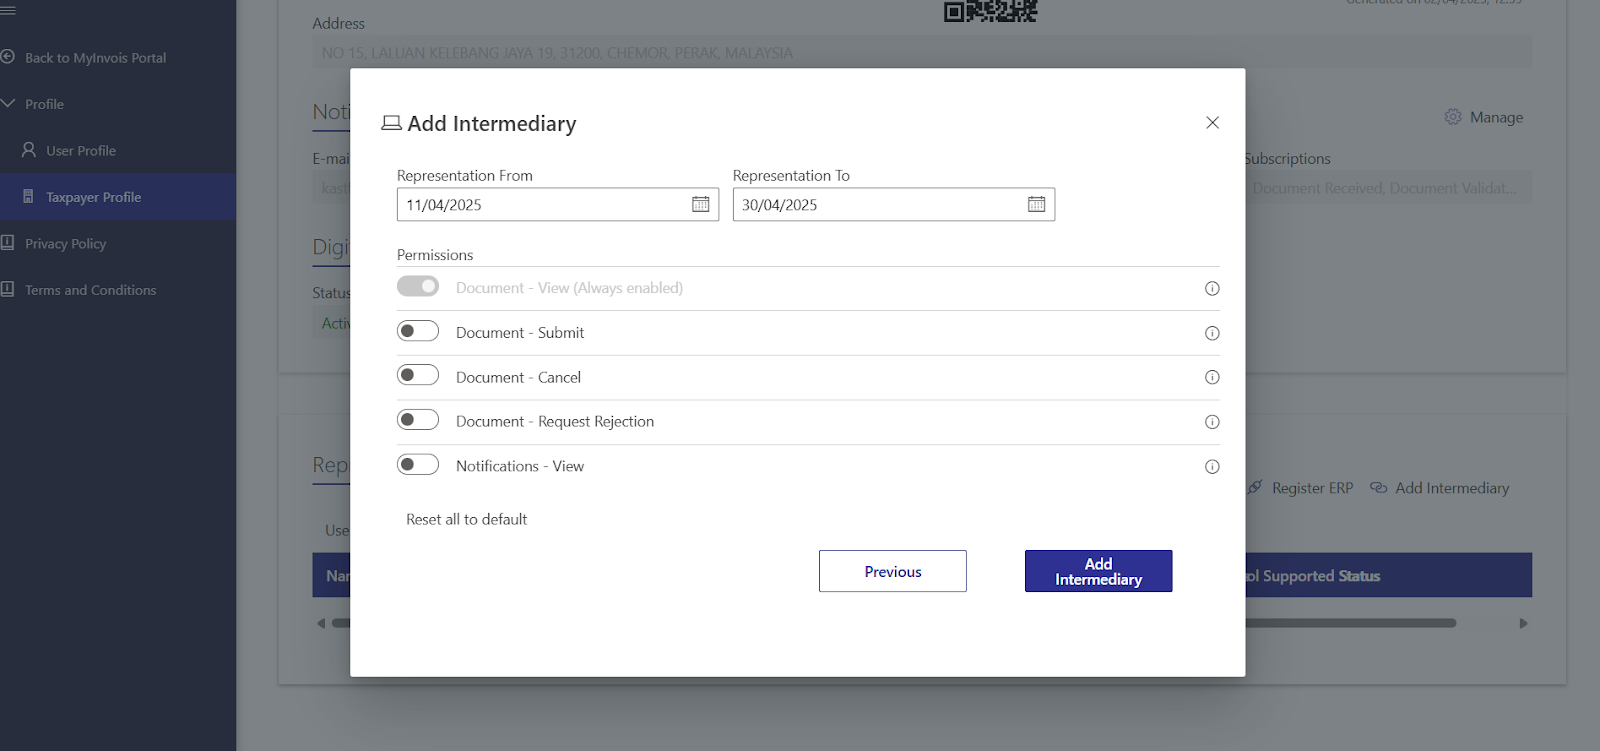
Step 5: Set the representation duration (preferably more than 1 year), enable all permissions, and click Save.
Set up and configure e-Invoicing in the BIG POS Web Admin
Web Admin Setting
Branch Page
Update the existing branch settings by ensuring all required fields are filled. If you have multiple branches, update each one accordingly.
General
(i) Name
(ii) Email
(iii) Contact number
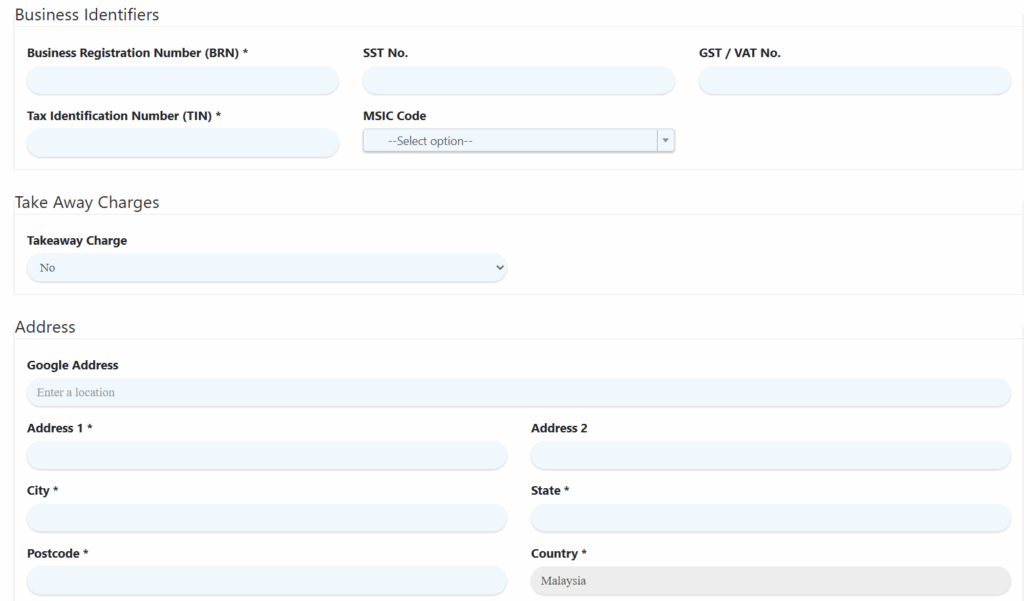
Business Identifiers
(i) Business Registration Number (BRN) (required)
(ii) SST No. (optional)
(iii)GST/VAT No. (optional)
(iv) Tax Identification Number (TIN) (required)
(v) MSIC Code (required)
Address (Required)
| Important Note – Can’t save branch settings unless all required fields are filled. |
Company Profile Page
This integration allows merchants to seamlessly submit consolidated e-Invoices directly from Bigpos to the MyInvois portal.
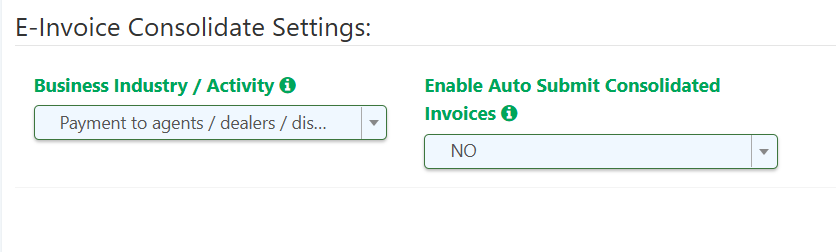
E-Invoice Consolidate Settings
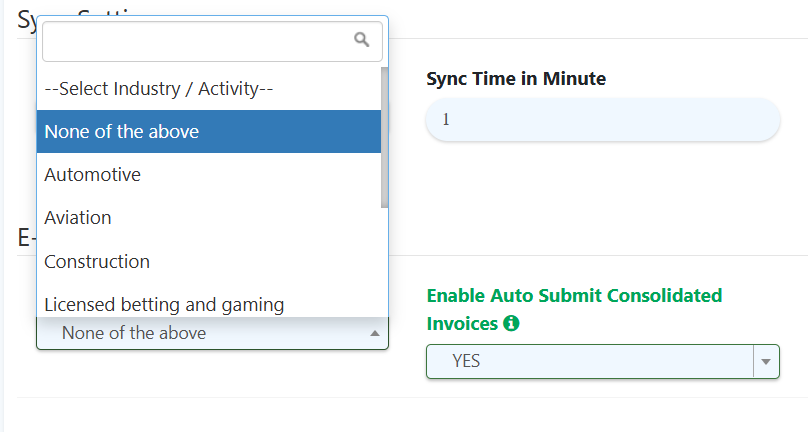
(i) Business Industry Setting
- Select the industry that best represents your current business. If your industry is not listed, choose “None of the above.”
(ii) Enable Auto Submit Consolidated Invoice
- Select “Yes” to allow the system to automatically submit consolidated e-Invoices from Bigpos to the MyInvois portal on the 3rd day of the following month.
- If you select “No”, e-Invoices will not be submitted automatically, and you will need to manually upload your monthly transactions to the IRBM portal.
Tax Page
Tax Type selection is mandatory for all tax entries (new or updated).
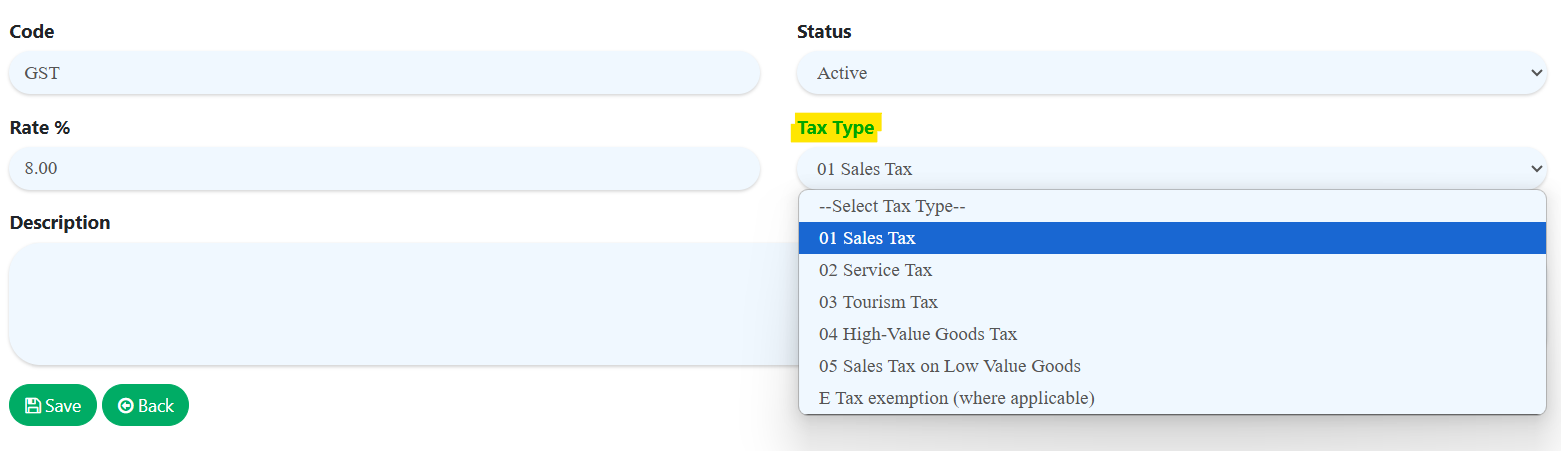
New Field: Tax Type
Select the applicable tax type for your business from the following options:
- 01 Sales Tax
- 02 Service Tax
- 03 Tourism Tax
- 04 High-Value Goods Tax
- 05 Sales Tax on Low-Value Goods
- E Tax Exemption
For more details on each tax type, please visit the MyInvois Tax Type Reference.
Product Page
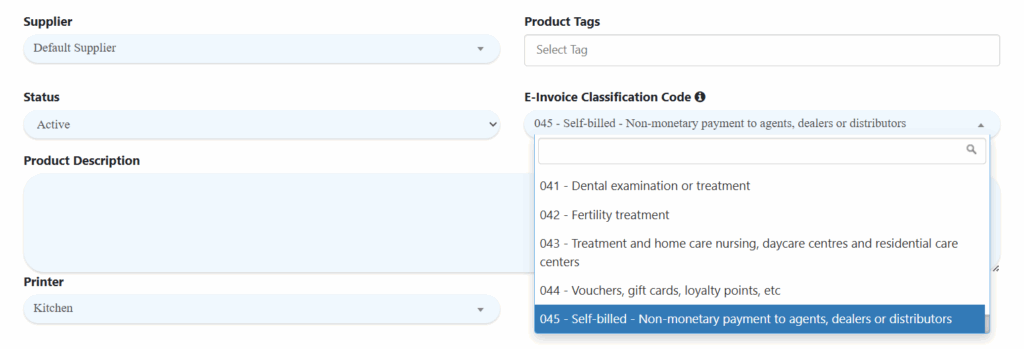
New Field: Classification Codes
This is a compulsory field. By default, E-Invoice Classification Code will be set to 022 Others, but it is recommended to update the appropriate classification code to indicate the category of the product or service being billed. Proper classification helps with accurate reporting under Malaysia’s e-Invoicing framework.
For more information and a complete list of codes, visit the MyInvois Classification Codes Guide.
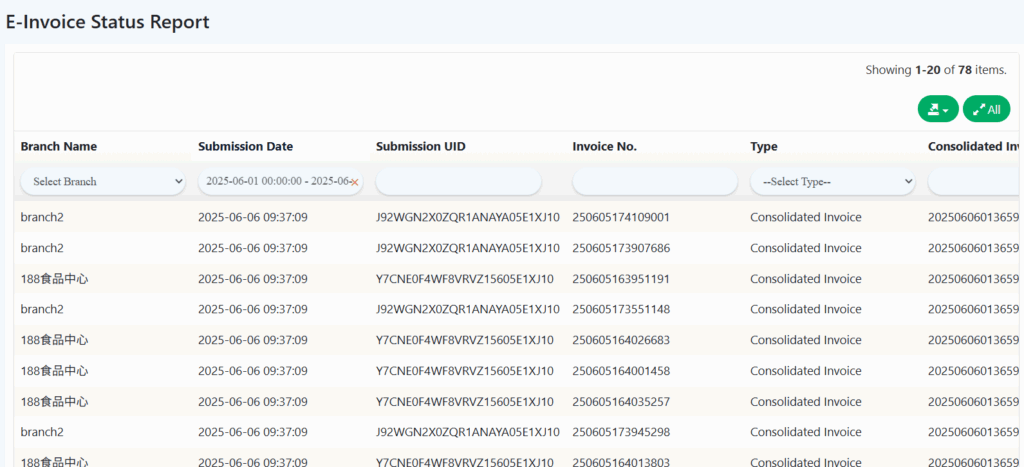
E-Invoicing Status Report
BIGPOS Pro App
Setting
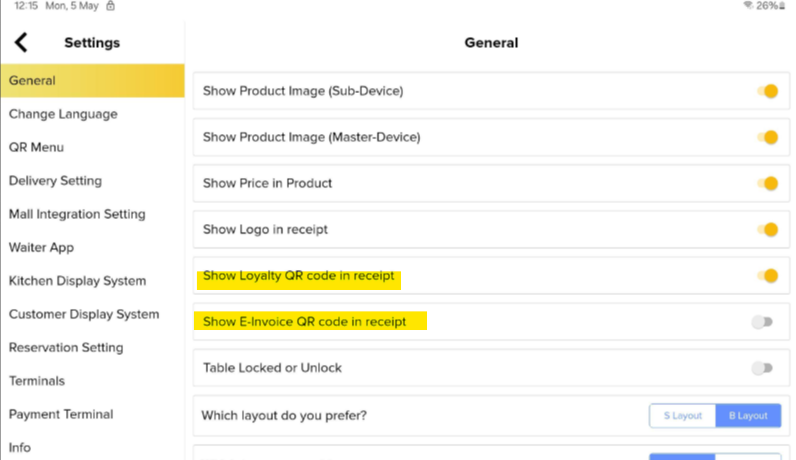
- To print the e-Invoice QR code on the receipt, you need to enable the setting under the General tab.
Enable “Show E-Invoice QR code in receipt”
Self-Ordering Kiosk (SOK)
- Create a transaction from SOK, generate an online receipt from SOK.


On the digital invoice, they will also have the option to request an e-Invoice by clicking the link in the QR from (Online receipt), which will redirect them to the E-Invoice Request Form.
- QR e-Invoice also displays in physical receipt print from SOK. It will display follow Pro apps settings.
How to issue an e-Invoice to the customer?
| Important Note – E-Invoicing is only available for BIG Pos Pro version 5.4.0 and above. Ensure your app version is up-to-date. – Remind to enable auto sync to avoid any issues during e-Invoice generation. |
There are 3 ways to issue an e-Invoice:
Option 1: For Customers Requesting a Printed Receipt
Step 1: Enable e-Invoice QR Code. Go to the general settings and enable the option to display the e-Invoice QR code.
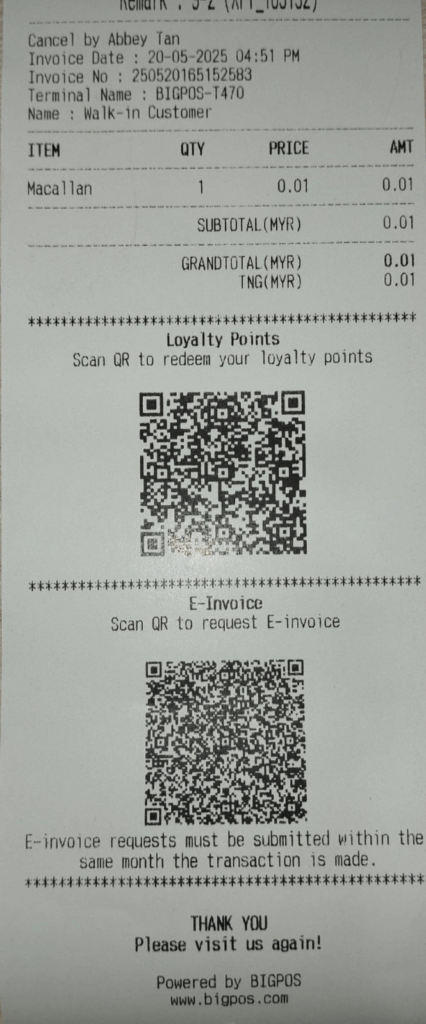
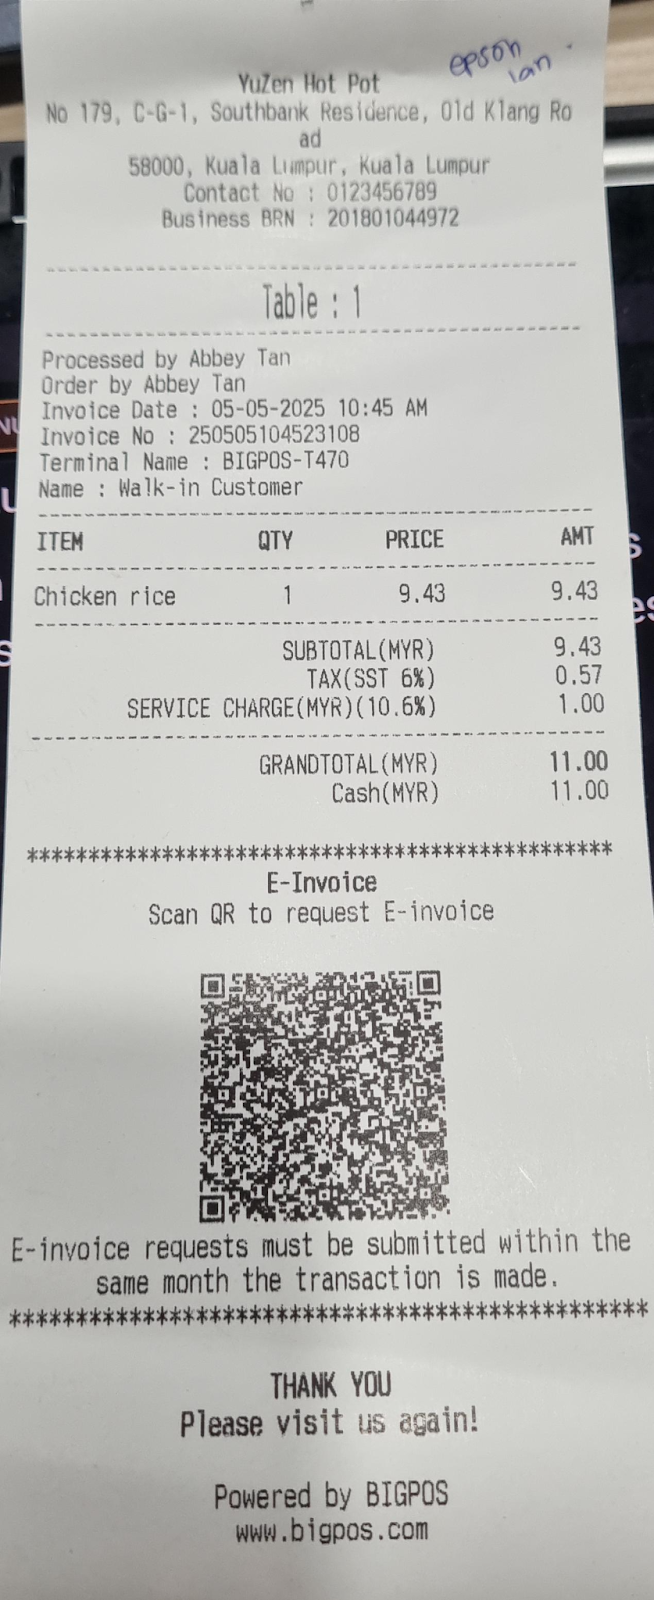
Step 2: Complete a transaction, and a receipt will be printed with the e-invoice request QR Code
Step 3: The Customer scans the QR, and it will be redirected to the e-Invoice request form.
Step 4: Fill up the required fields
Step 5: Submit for validation by LHDN

Option 2: Customer who requests an Online Receipt
Step 1: Enable e-Invoice QR Code. Go to the general settings and enable the option to display the e-Invoice QR code.
Step 2: Allow the customer to scan the Online Receipt QR from the POS system. Once receive the online receipt, they can click the hyperlink and it will be redirected to the e-Invoice request form.
Step 3: Fill up the required fields

Step 4: Submit for validation by LHDN
Option 3: Customer scans e-Invoice QR directly from the POS system
Step 1: Go to the transaction page, press the QR icon in the top right corner.
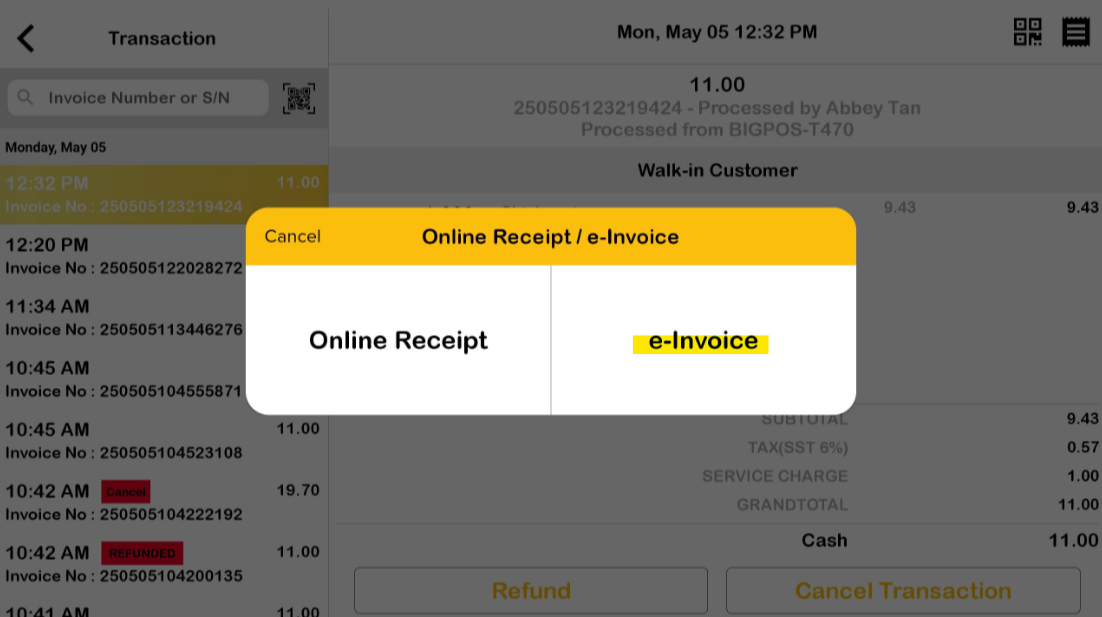
Step 2: Choose the e-Invoice and allow the customer to scan directly from the screen itself, and it will be redirected to the e-Invoice request form.

Step 3: Fill up the required fields

Step 4: Submit for validation by LHDN

| Important Note : – The e-Invoice form can’t open if the transaction not sync yet. – E-Invoice form available within same month. |
How customer request e-Invoice? (Single submission)
| Important Note Submission Deadline: – E-Invoice requests must be submitted within the same month as the transaction date (even for last-day transactions). – Example: A March 31st transaction must be submitted by March 31st. |
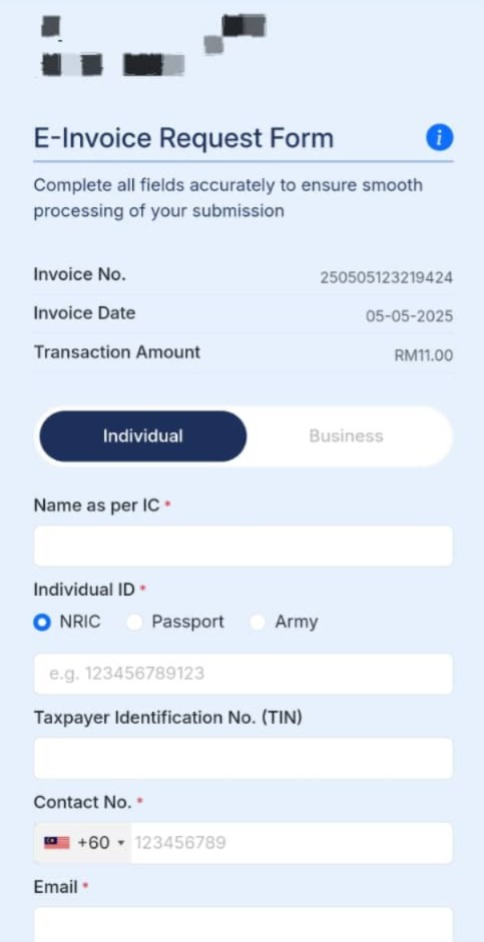
Step 1: Scan the QR code or click the hyperlink on the receipt.
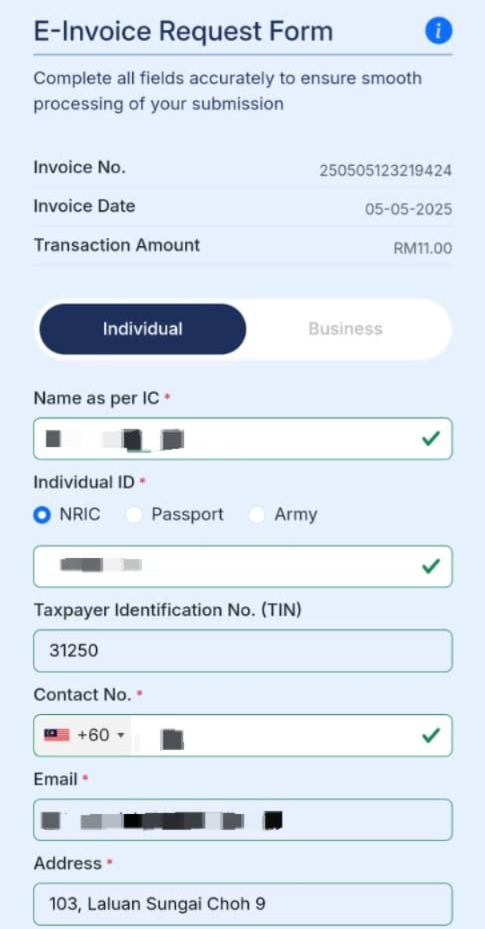
Step 2: Fill out and submit the E-Invoice Request Form for Individual/Business.
Example scenario for individual and business for a single submission
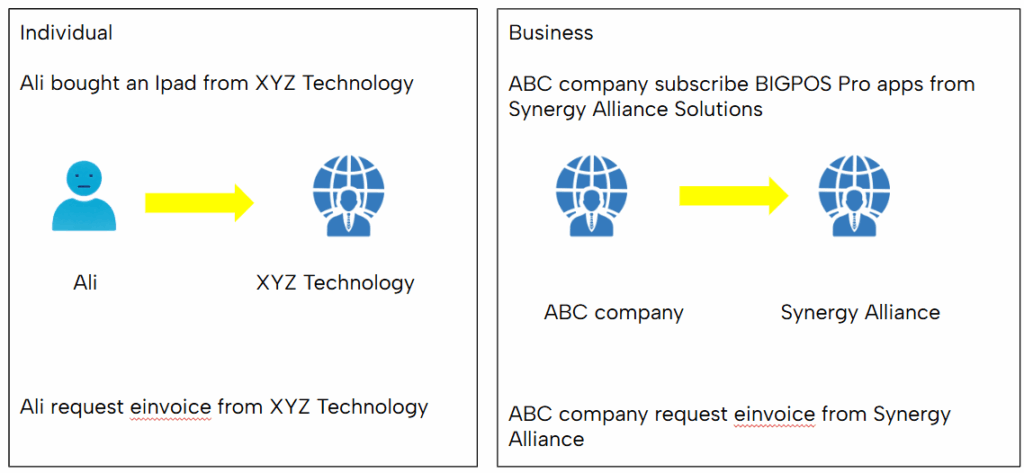
| Individual | Business |
 | 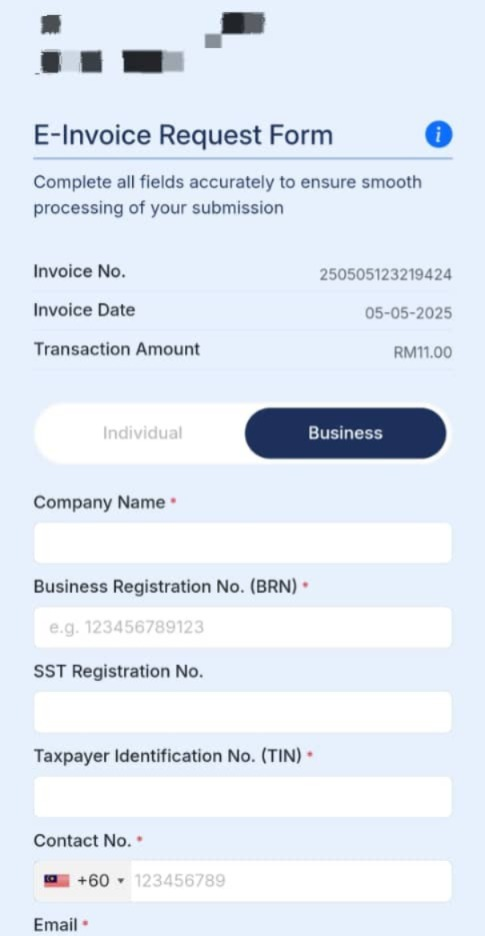 |
Step 3: LHDN will verify the submitted data
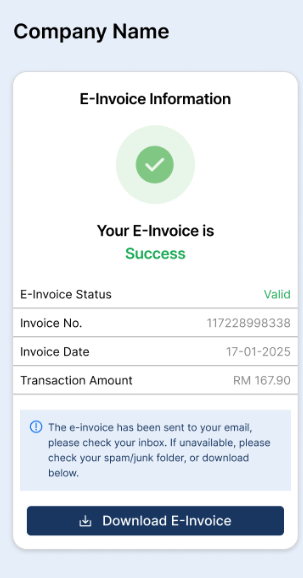
Step 4: Rescan the QR code or re-click the link to download the valid e-Invoice. A copy will be emailed to the customer’s email.

Email from LHDN

Email from BIG POS
| Important Note : – Customer will not receive any email if E-Invoice Status: In Progress/Invalid – Merchant able to access the Invalid E-Invoice through their MyInvois Portal – In the case of customer’s submission is Invalid, customer may contact merchant to cancel or reject the invoice manually in MyInvois Portal |
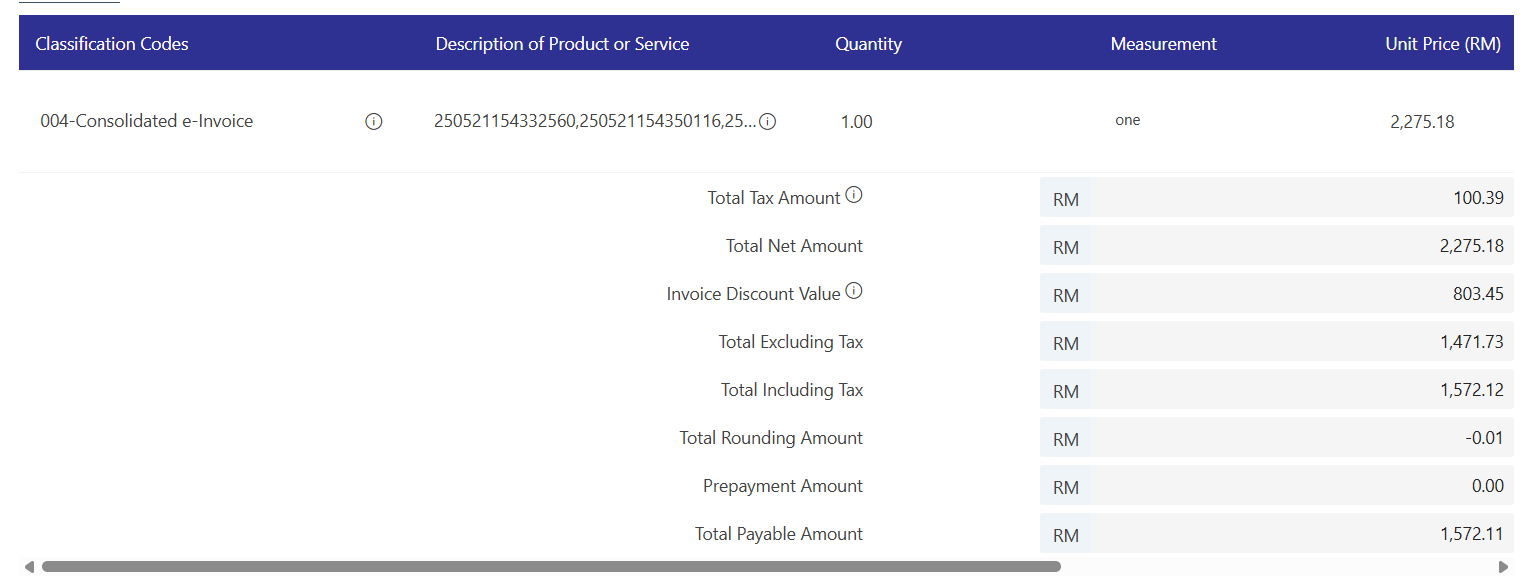
How to check consolidated submission?
Consolidated invoice works to auto submit merchant transactions for every month. Merchant no need to manually submit to MyInvois portal.
Step 1: Enable auto submit consolidated invoice from web admin settings (Company Profile).
Step 2: On 3rd day of the respective month, ‘API’ will auto submit the whole previous month transaction into My Invois.
Step 3: Bigpos email will be sent to Merchant’s email (Company Profile) and CC to Branches emails.

There’s three submission Status: In Progress, Valid and Invalid.
In the case that any submission is still In Progress, email will be sent again until all the submissions are either Valid or Invalid.
Step 4: Check My Invois portal for submitted consolidated invoices